Support / Security & Compliance
Trusted IP Addresses and Whitelist Settings
Two IP settings in Store Settings make life easier for you and your team:
- Trusted IP Address: stops the "someone logged in to your dashboard" email when the login comes from your own computer, so you don't have to switch those emails off.
- IP whitelist: lets you see your own website from a state or country where it's blocked, with no VPN.
Open the Security settings
Updated Oct 25, 2026
- Log in to your dashboard and click Store Settings under Settings in the left menu.
-
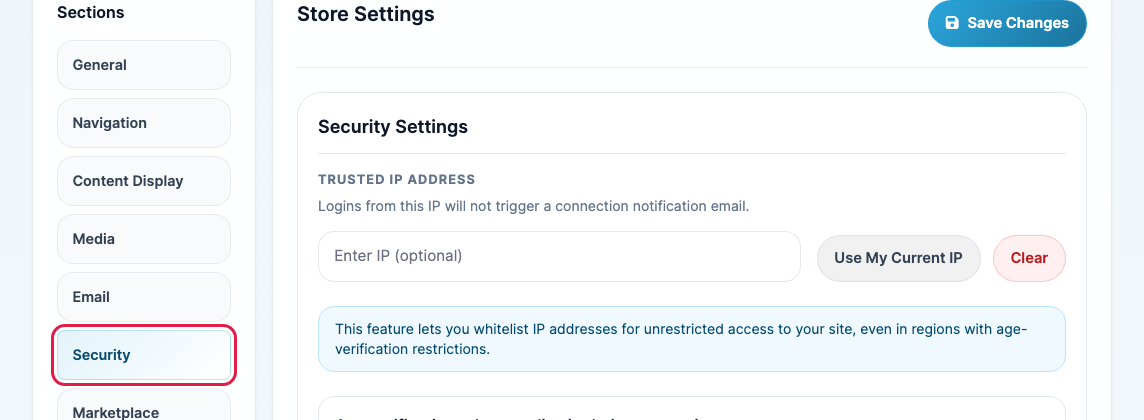
Click Security in the Sections list.
Set a trusted IP address
Updated Oct 25, 2026
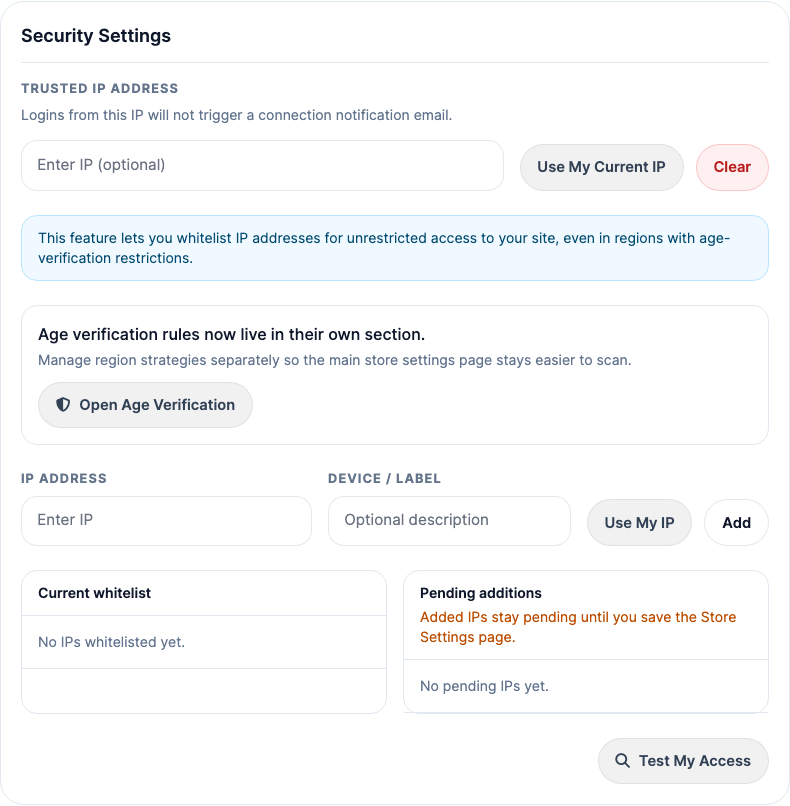
- On the computer you log in from, click Use My Current IP under Trusted IP Address to fill in its IP address. You can also type one in.
- Click Save Changes at the top of the page.
Logins from that IP address no longer send you a login email. Logins from anywhere else still do. Click Clear and save to remove it.
Whitelist your IP to see your site
Updated Oct 25, 2026
Because of new laws, your website is blocked in some states and countries, and that includes you as the owner. If you're in one of those places, add your IP address to the whitelist:
- Click Use My IP to fill in your current IP address, or type one in. Add a Device / Label so you remember whose it is, for example "Home laptop".
- Click Add. The address appears under Pending additions.
- Click Save Changes at the top of the page. Pending addresses aren't saved until you do.
Saved addresses are listed under Current whitelist. Click Remove to take one off. Repeat the steps for each device or teammate that needs access.
To check that it worked, click Test My Access. It shows your current IP address and whether it's whitelisted.
Good to know: most home internet connections change IP address from time to time. If you're blocked again later, add your new IP address the same way.