
Getting Started with PaysiteManager
This guide walks through every step from applying to launching your website: what you need to do, what our team does, and roughly how long each part takes. Once your site is live, continue with Once Your Website Is Live.
Good to know: we'll email you at each stage and let you know whenever we need something from you. If you're ever unsure where things stand, reply to any of our emails.
Step 1: Apply
-
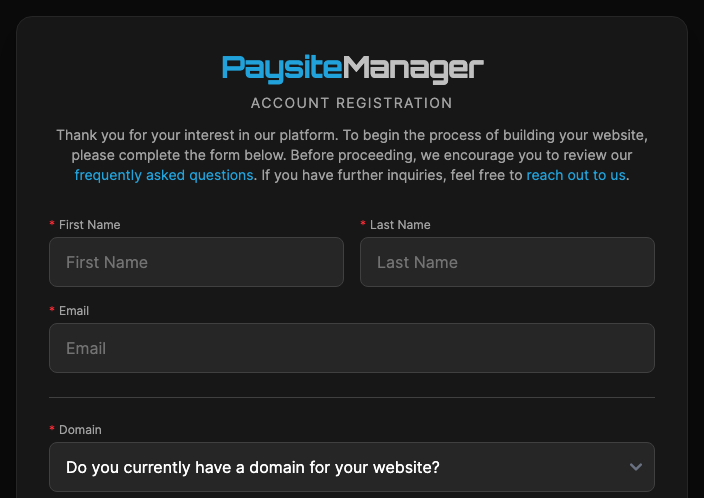
Click Sign Up on paysitemanager.com to open the Account Registration form. Fill in your name and email, whether you already have a domain for your website, and the Username and Password you want. Keep these safe: you'll use them to log in throughout setup.
-
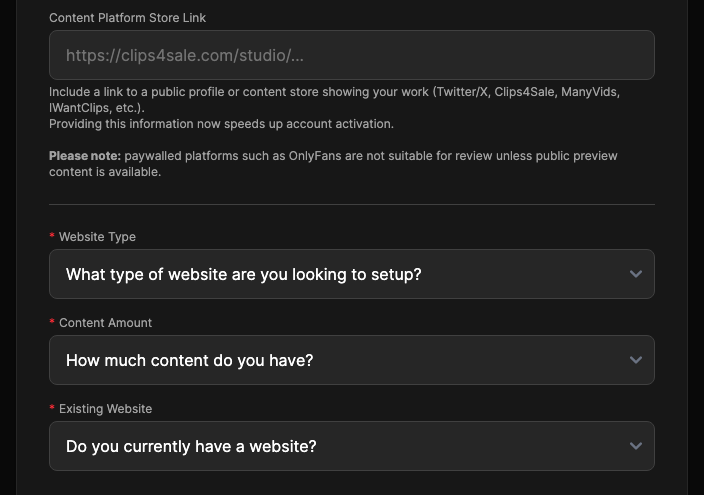
Add your address, then tell us about your content. A Content Platform Store Link is optional but speeds up approval: link a public profile or store that shows your work, such as Clips4Sale, ManyVids, IWantClips or Twitter/X. Paywalled platforms such as OnlyFans can't be reviewed unless they have public previews. Choose your Website Type, Content Amount and whether you have an Existing Website, tick I agree to the agreements, and click Register.
You'll get an email confirming we've received your application, with an overview of the steps below.
Step 2: Content review
Our team reviews your application and the content links you provided, to make sure your content is a good fit for the platform and meets our payment processors' requirements. If we have questions or need more examples, we'll contact you before going further.
Step 3: Complete your profile
Once your application passes review, you'll get an email titled Please complete your profile information. Click Log In to Complete Your Profile and log in with the username and password you chose when you registered. The profile has four steps:
- Contact information: check your name, address and contact details.
- Tax and payment method: your tax details and how you'd like to be paid.
- Identity verification: photos of the front and back of your government-issued ID, a selfie holding your ID, and a short video showing your face and both sides of your ID.
- Payment information: the account details for your payment method.
When you finish, you'll see Thank You! and your application moves to Under Review. There's nothing more to do until we contact you.
Step 4: Final checks and site setup
We validate your ID, address and payment details, and contact you if anything else is needed. Once your account is approved, we start building your website. If you log in during this time, you'll see Your Site Is Being Configured.
Step 5: Welcome and walkthrough
When your site is ready, you'll get a welcome email with your dashboard login, how to manage your new website, and a link to book a one-on-one walkthrough with our team. Our Adding Content and Setup Banners guides are a good place to start.
Step 6: Compliance review and launch
Before a new website can take payments, the payment processor reviews it once. After your walkthrough:
- Upload at least 20 complete content sets. They must meet Visa, Mastercard and processor content rules: click Content Policy on your Content page, where you can also download the list as a PDF. Keep these first sets tame.
- We submit your website to the payment processor. Their review usually takes two weeks to a month.
- Once the processor approves your site, we finish the launch steps and turn on payments. Your site is live.
If any of your content doesn't go live after uploading, see Why Isn't My Content Live Yet?