Support / Your Site
Setting Up Your Banners and Logos
Your banners and logos are the first thing visitors see, and they put your brand in front of every fan. You can upload and change them yourself at any time from Site Graphics in your dashboard.
Good to know: each graphic shows its Suggested Size. Use that size (or the same shape, larger) so it isn't stretched or cropped on your site. Images can be JPG, PNG or WebP, and the upload box shows the file size limit.
Upload a banner or logo
Updated Oct 25, 2026
-
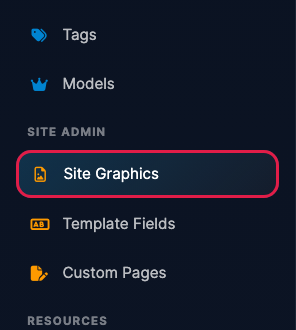
Log in to your dashboard and click Site Graphics under Site Admin in the left menu.
-
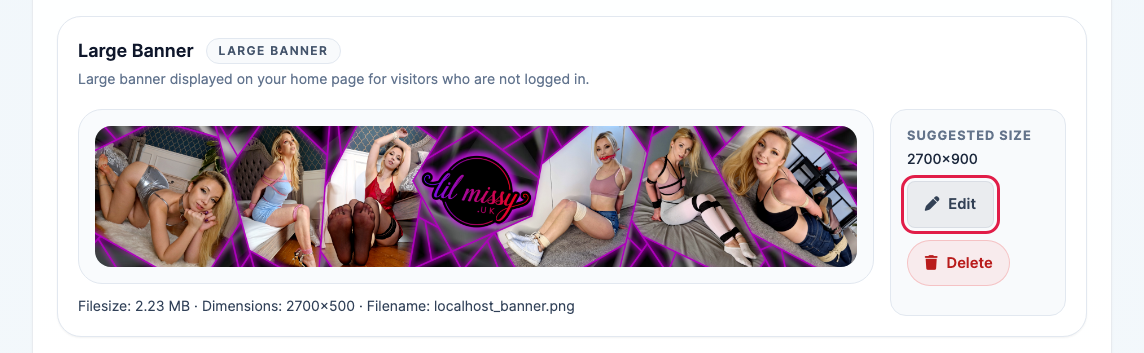
Every graphic your site uses is listed, with its suggested size and a preview of the current image. Click Upload on an empty one, or Edit to replace one you've already added.
-
Drag your file into the Image Upload box, or click Browse to pick it. Wait for the upload to finish, then click Save.
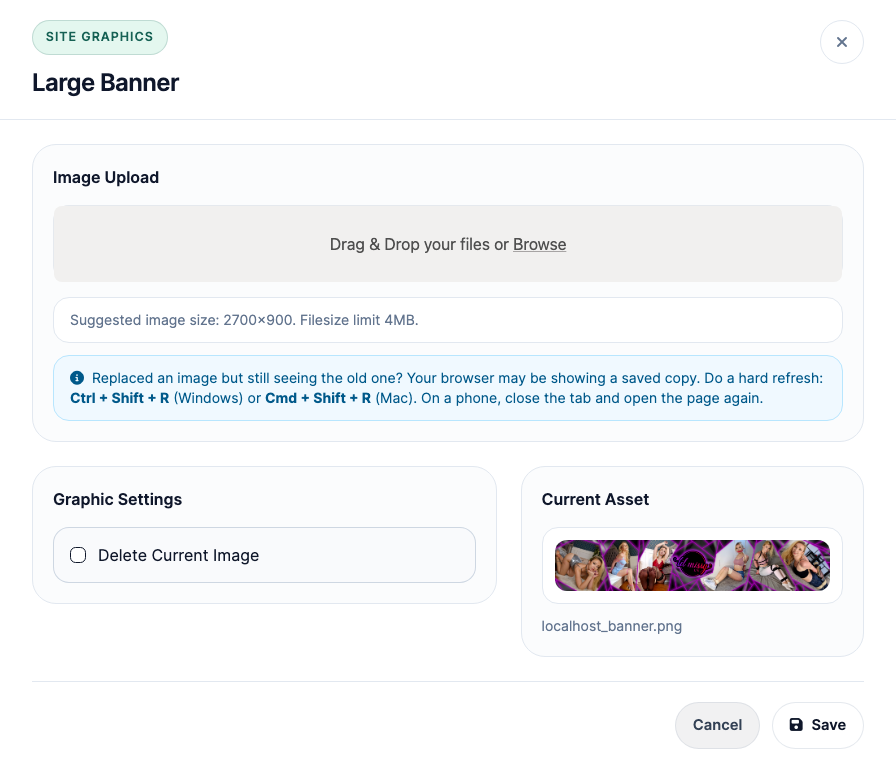
- Open your website to check it. If you still see the old image, your browser may be showing a saved copy: press Ctrl + Shift + R (Windows) or Cmd + Shift + R (Mac). On a phone, close the tab and open the page again.
To remove an image, click Delete on its card, or tick Delete Current Image in the edit window and click Save.
Start with these three
Updated Oct 29, 2026
- Large Banner (2700×900): the main banner on your home page for visitors who aren't logged in.
- Logo (200×24): shown in the top left corner of your site, in place of your site name.
- Warning Page Logo (617×74): shown on the age warning page visitors see before they enter your site, and at the top of your payment pages (join, purchase and custom video invoice).
The other graphics
Updated Oct 29, 2026
These are optional. Add them when you want to customize your site further:
- Payment Page Logo: only on stores that uploaded a Join Page Logo before. It shows on your payment pages instead of your Warning Page Logo. Newer stores don't have this one; their payment pages use the Warning Page Logo.
- Guest Banner (2700×300): the header banner for visitors who aren't logged in.
- Logged in Banner (2700×300): the header banner for logged-in visitors.
- Member Banner (2700×300): the header banner for paying members. Stores that sell videos only, with no memberships, don't have this one.
- Video Banner (1920×1080 or smaller): a video trailer for your home page. When it's uploaded and Enabled, it shows in place of the Large Banner. It takes MP4, MOV, WebM, MPEG and M4V files up to 80MB. After you save, it's converted to a lighter MP4 so your home page loads faster; any sound is kept.
- Cross Sale Banner (2700×300): a banner at the bottom of your site that promotes another website, for example if you run two sites.
Set up a Cross Sale Banner
Updated Oct 25, 2026
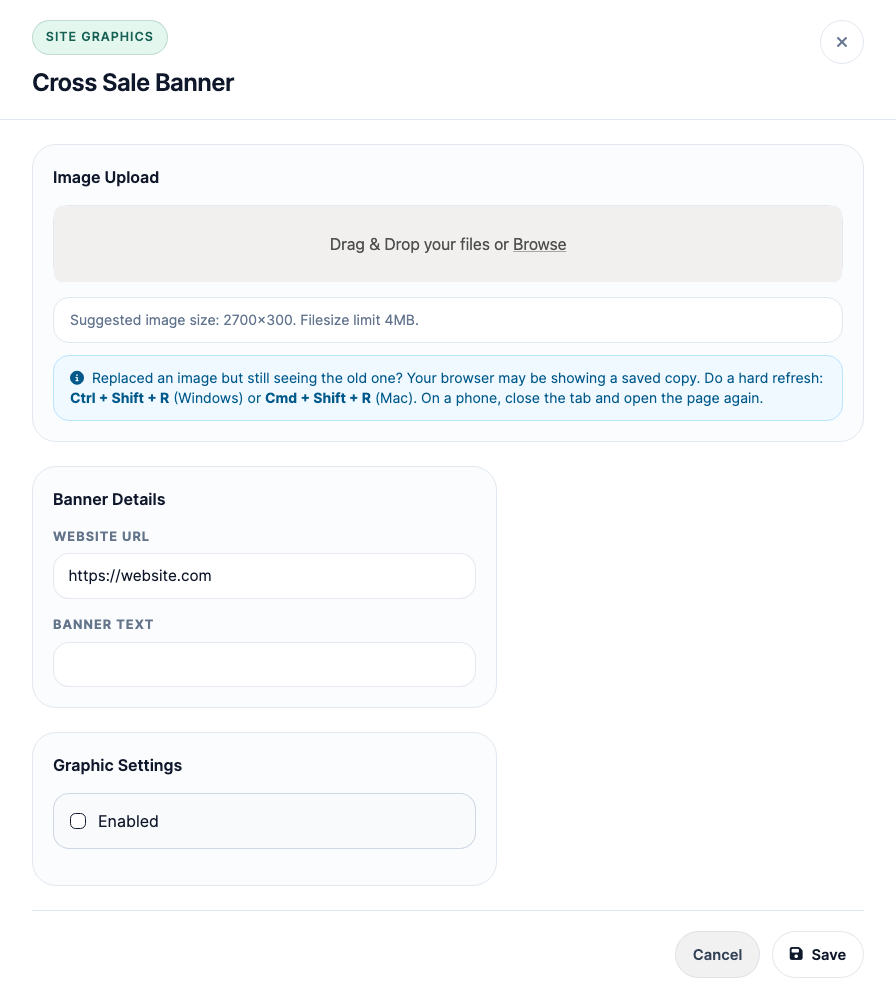
The Cross Sale Banner has a few extra settings:
- Website URL: where the banner goes when it's clicked.
- Banner Text: a short line of text to go with the banner.
- Enabled: tick this to show the banner on your site. Untick it to hide the banner without deleting it.
Need help with artwork?
Updated Oct 25, 2026
If you're having trouble coming up with artwork for your Large Banner, Garrett may be able to help you work something up. Email [email protected].