To enable automatic tweeting of your content updates, you’ll need to connect your website to your Twitter account using Twitter API credentials.
1. Sign in with your Twitter account:
- If you already have a Twitter account, sign in. If not, create a Twitter account first.
2. Go to the Twitter Developer website:
- Visit developer.twitter.com
- Click on Create an App to start the process
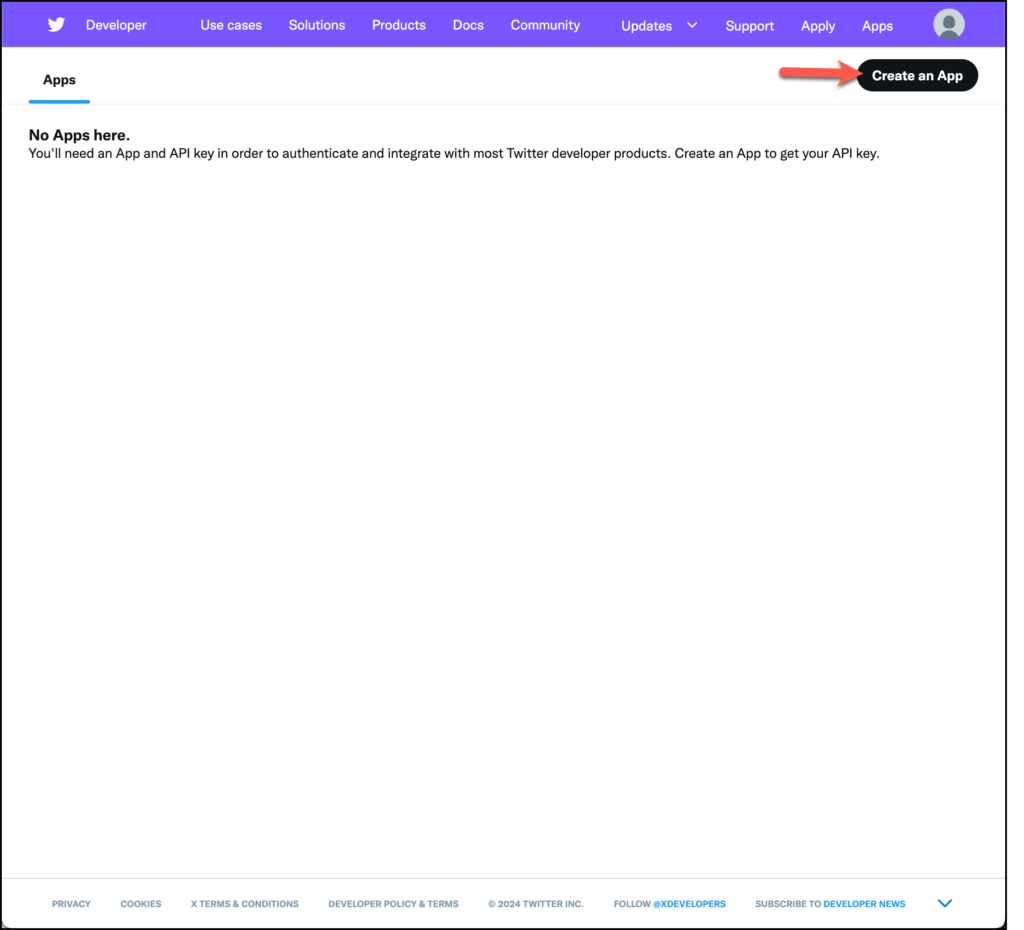
3. Click “Apply for a Developer Account”:
- You will be prompted to apply for a Developer account if you don’t already have one.
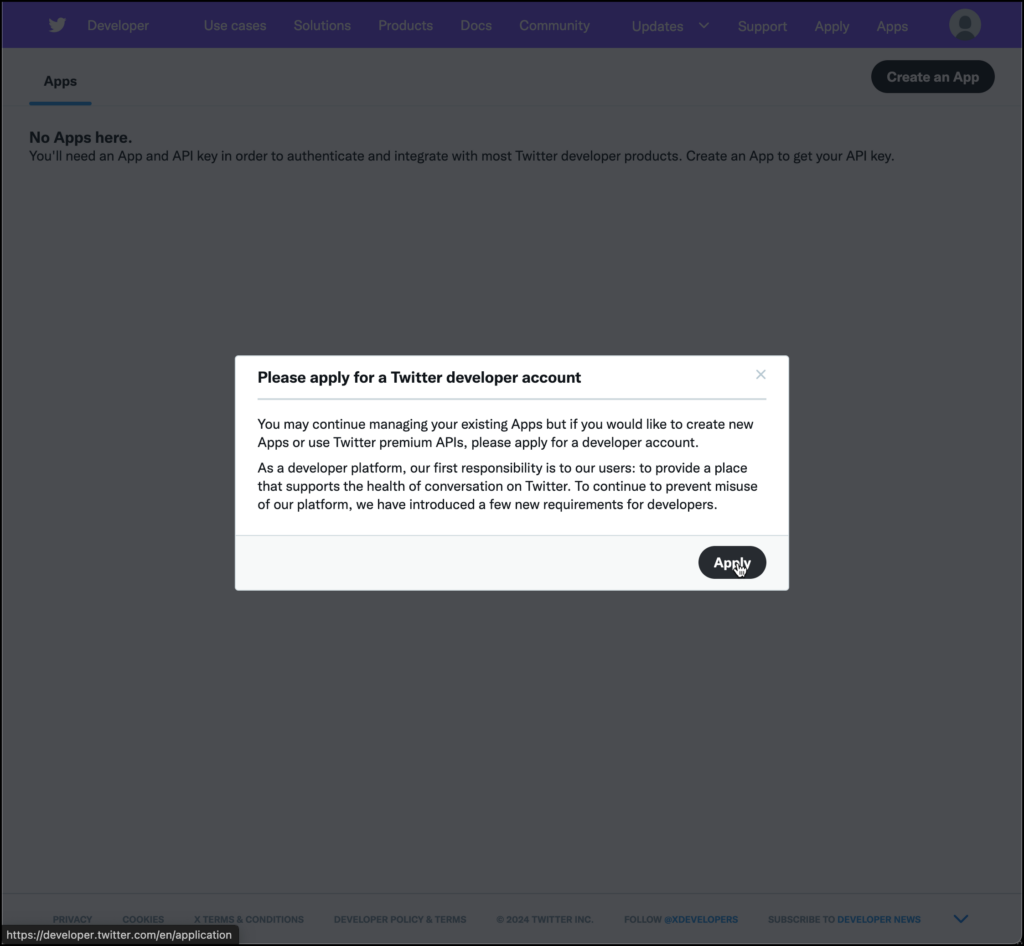
4. Scroll down the page and click on “Sign up for free account”
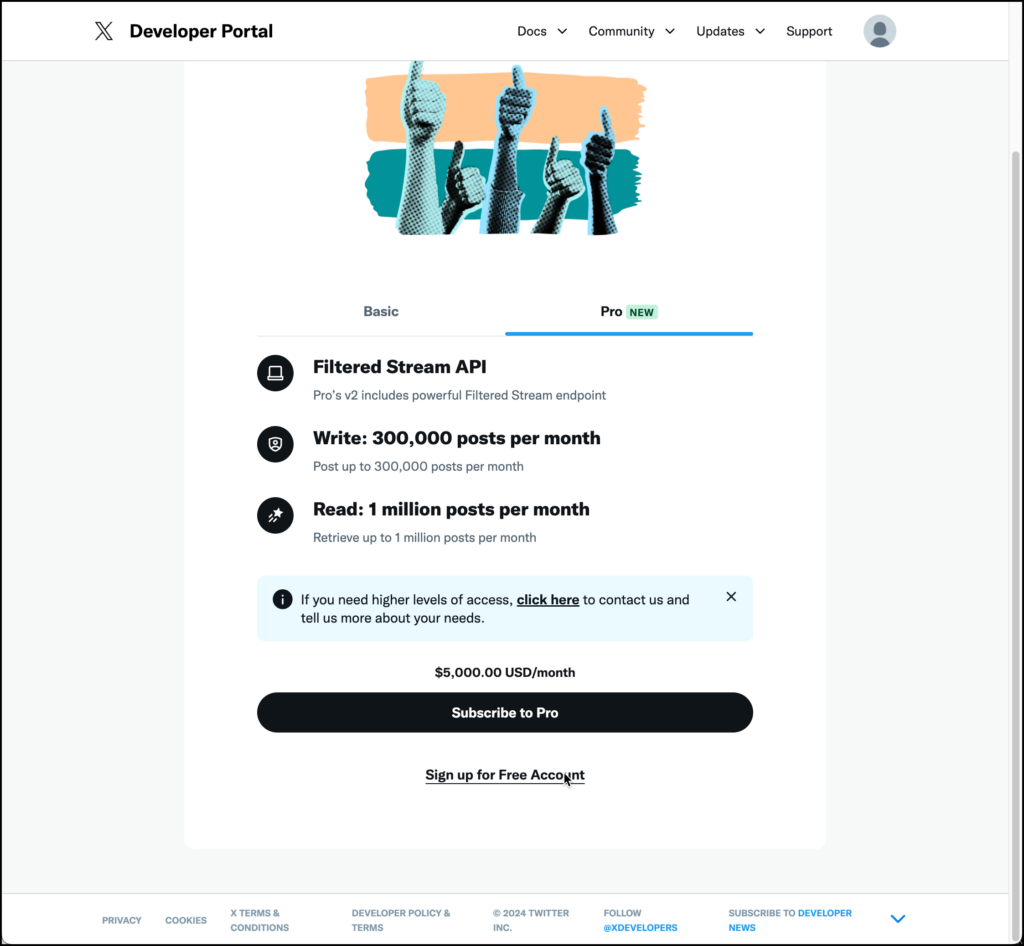
5. Fill out the application:
- example text to use for description of use case:
Our platform utilizes Twitter’s API to automate tweets based on specific user actions or scheduled marketing campaigns. This integration allows us to:

• Automatically post updates about new content or events.
• Enhance user engagement by sharing relevant and timely tweets.
• Promote our services or products to a wider audience through scheduled marketing campaigns.
• Drive traffic from Twitter to our platform, ensuring a consistent and engaging digital presence.

This automation helps streamline our social media efforts while maintaining a connection with our audience in real time.
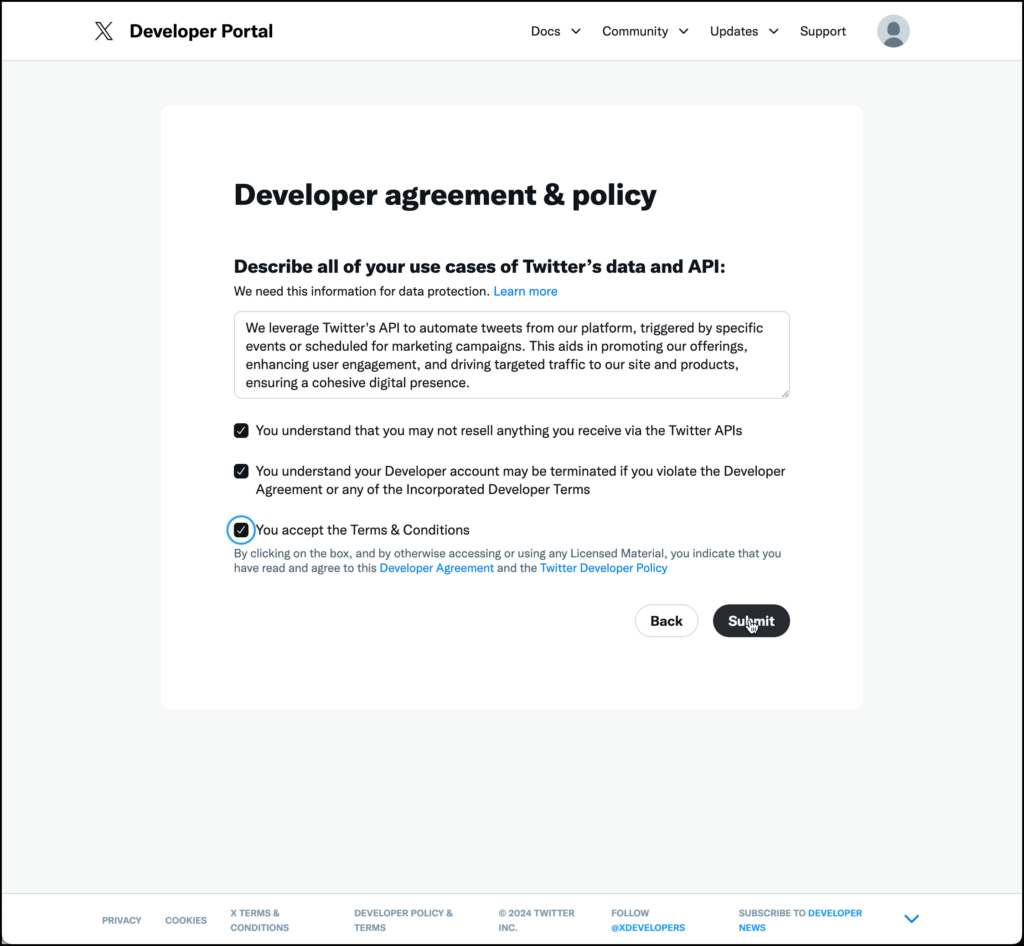
6. Submit your application:
- Once you’ve filled everything out, submit the application. Approval can take anywhere from a few minutes to a few days, depending on the volume of requests.
Step 2: Wait for Account Approval
• After submitting your application, you’ll receive an email from Twitter about the status of your application. If approved, you will have access to the Twitter Developer Dashboard.
Step 3: Access the Twitter Developer Dashboard
Once your Developer account is approved, log in to the Twitter Developer Dashboard to create and manage your apps.
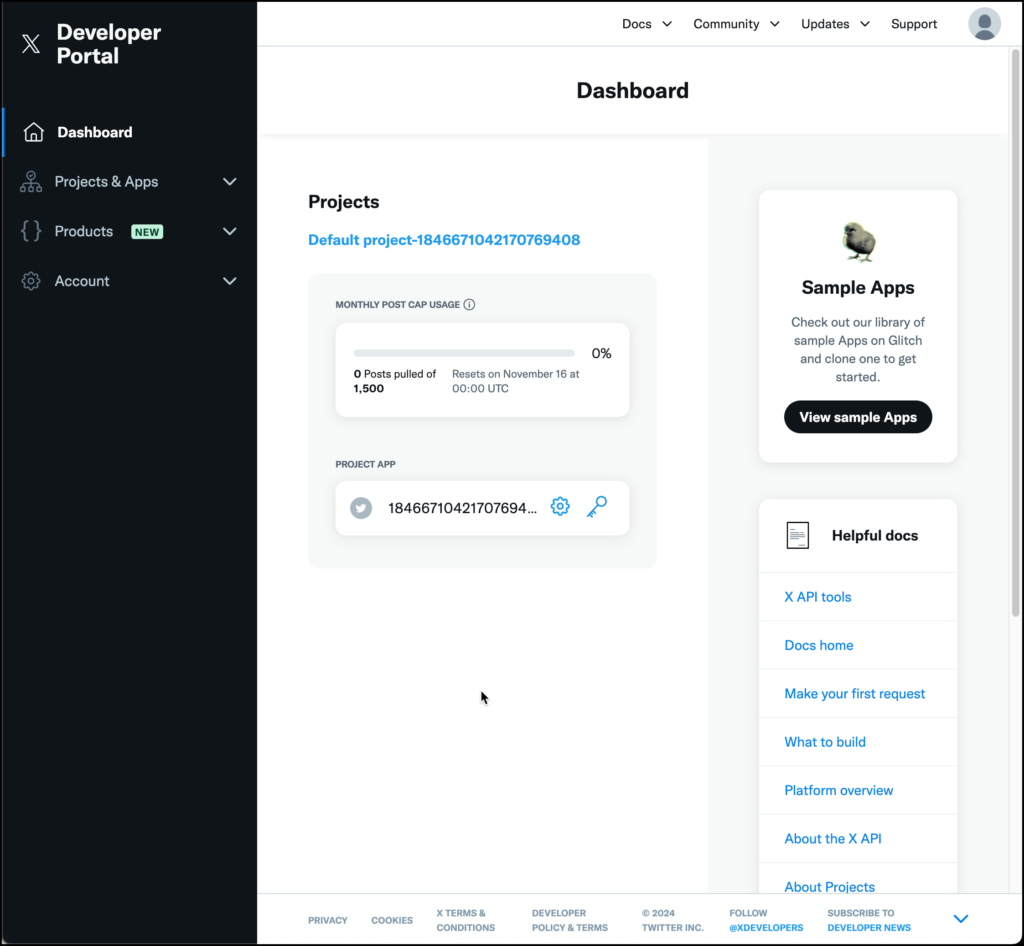
- Select the Default Project:
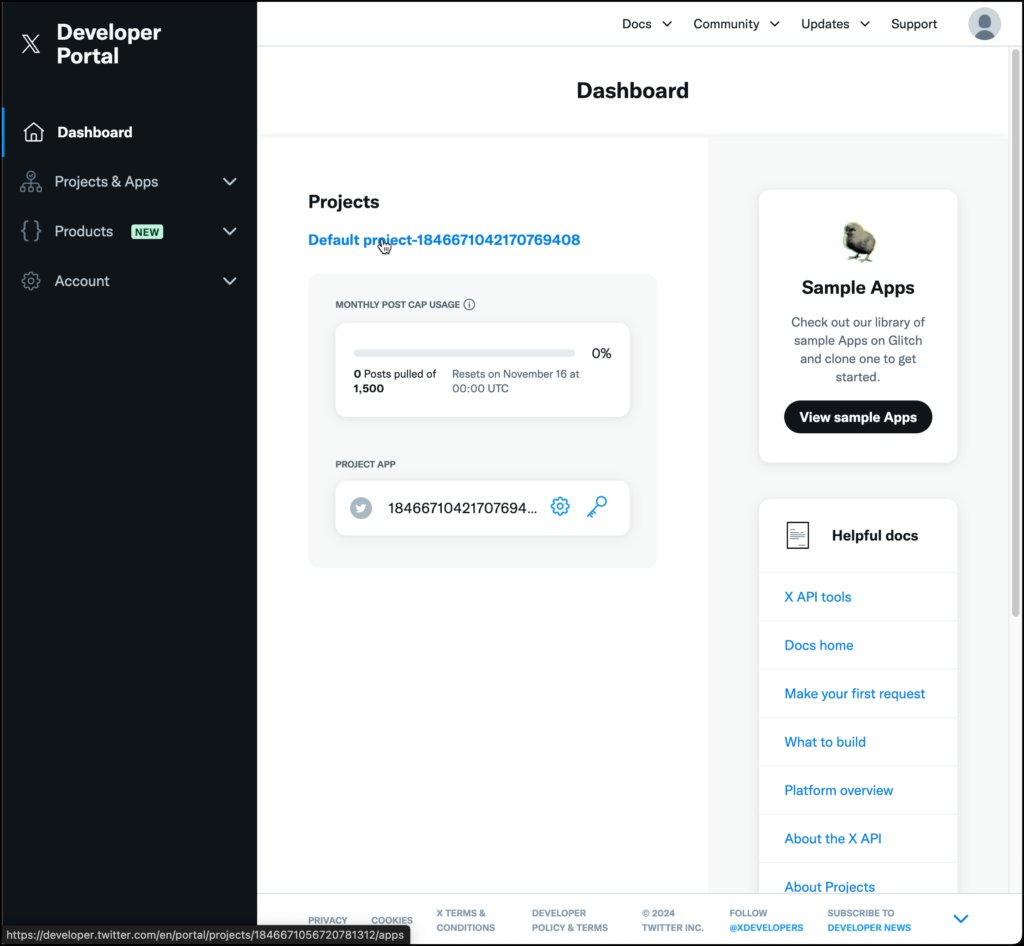
- When your developer account is first set up, Twitter automatically creates a default project for you. Click on the project name to open it.
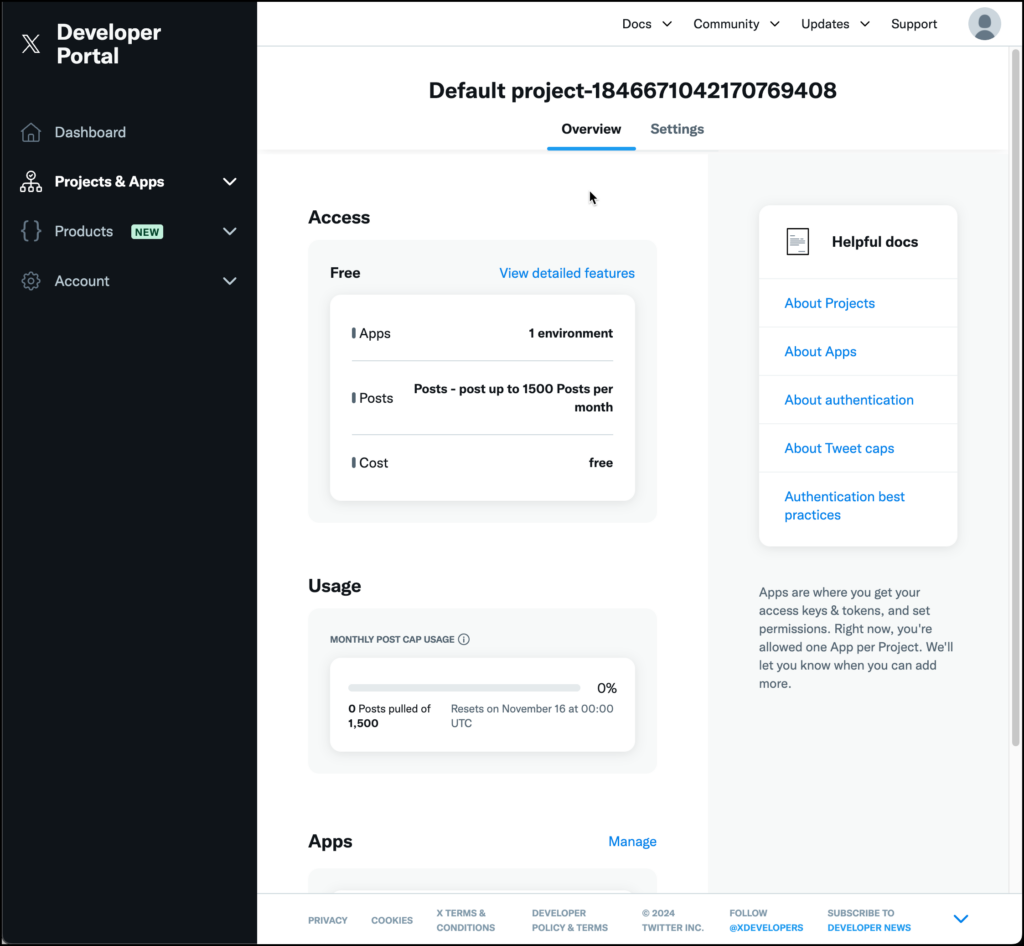
2. Delete the Default App:
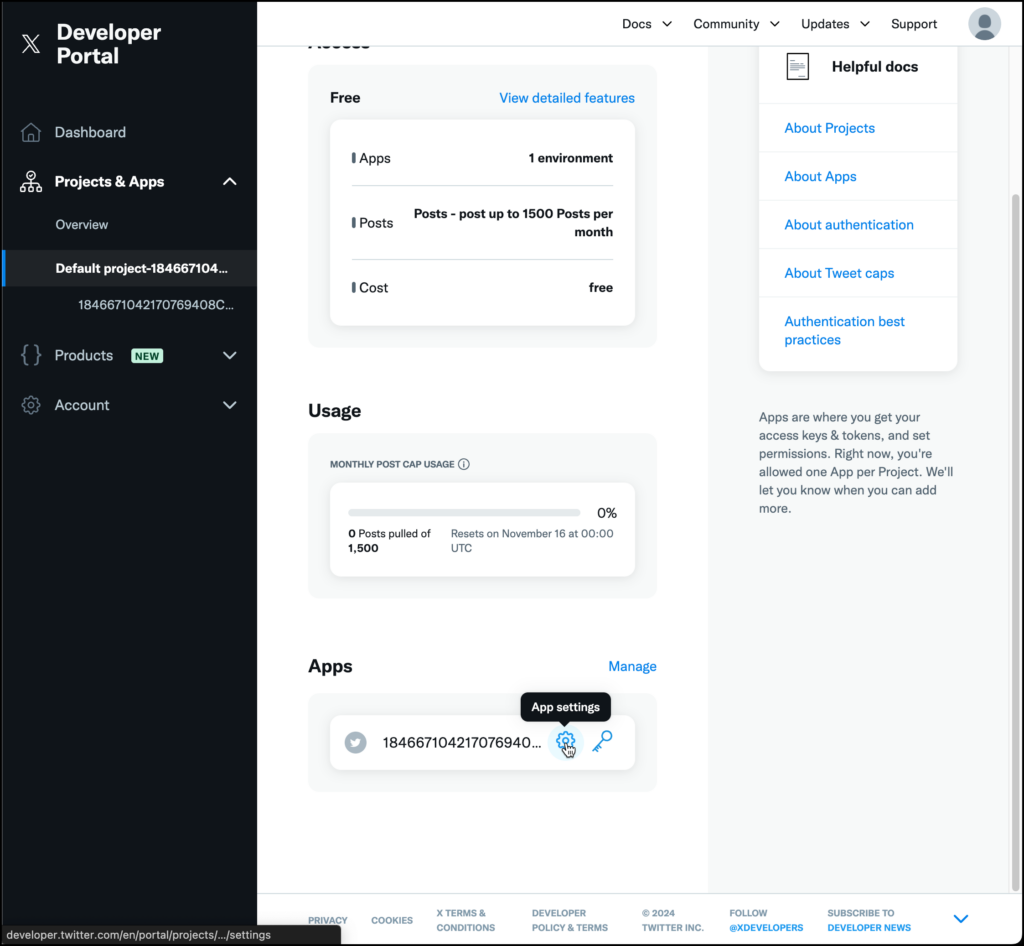
- Once on the Overview page, scroll down the page until you see the App
- Click on the gear icon to access the App settings.
- Click on the Edit button
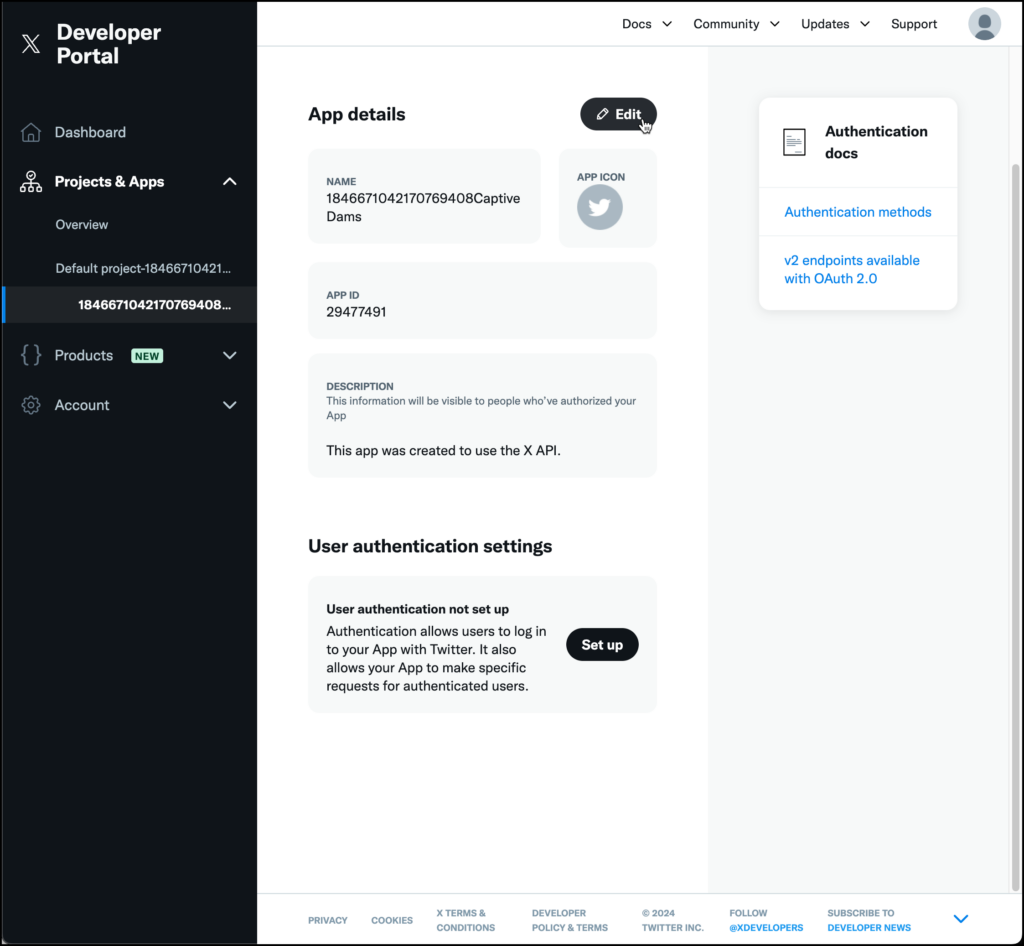
- Copy the App name from the text area
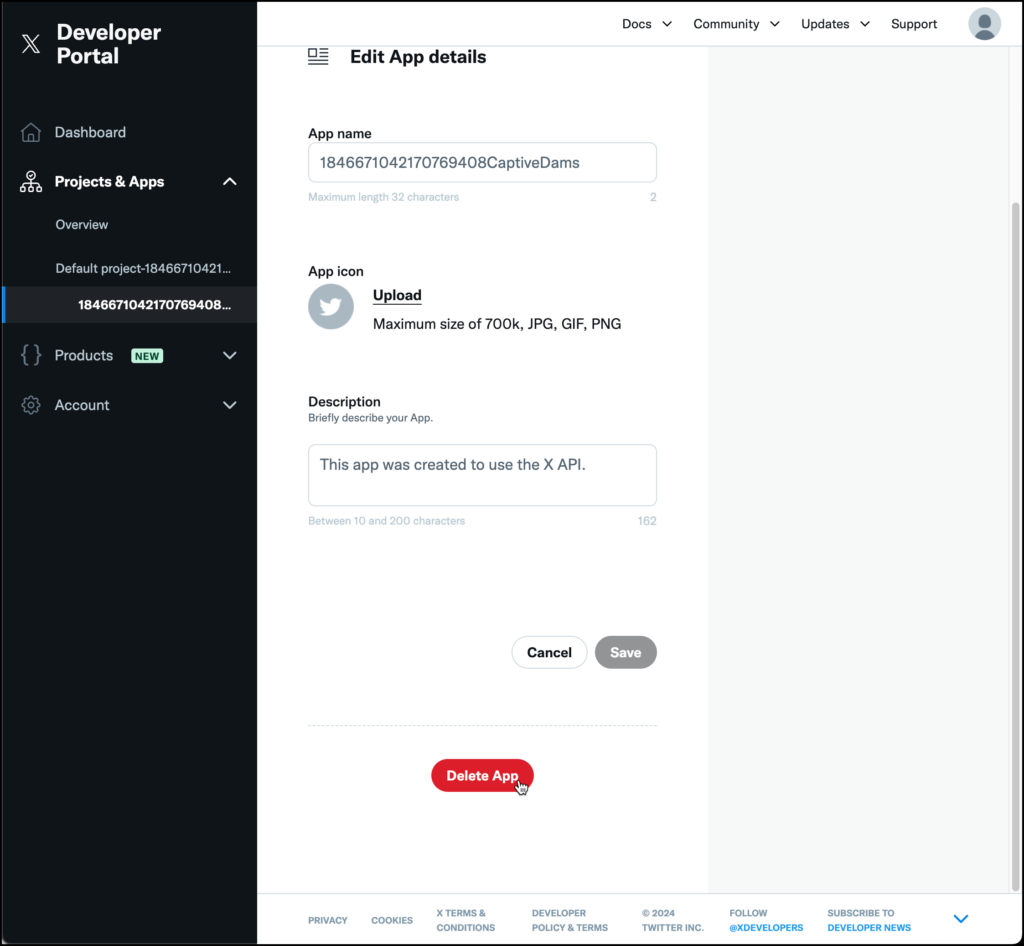
- Scroll to the bottom of the page and look for the “Delete App” button.
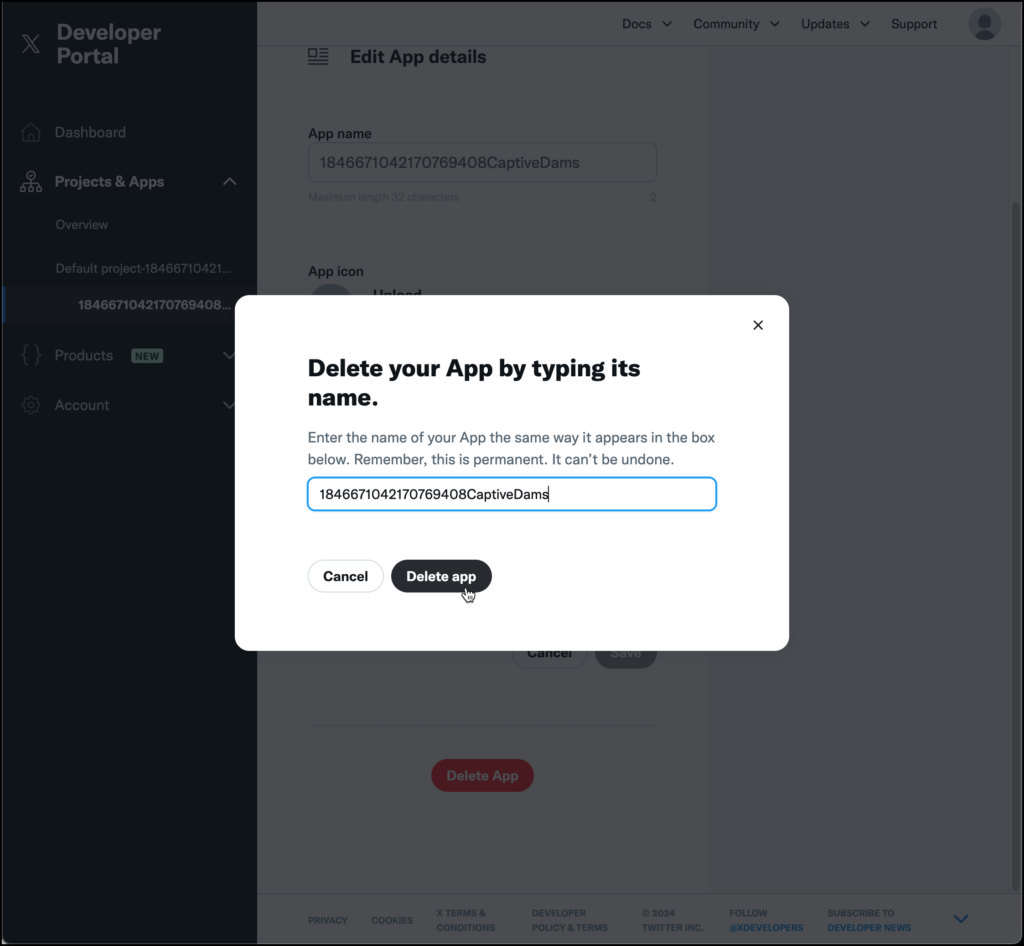
- Click “Delete App” and confirm your action in the prompt that appears.
- Paste the App name you copied from step above
Step 4: Create a New Twitter App
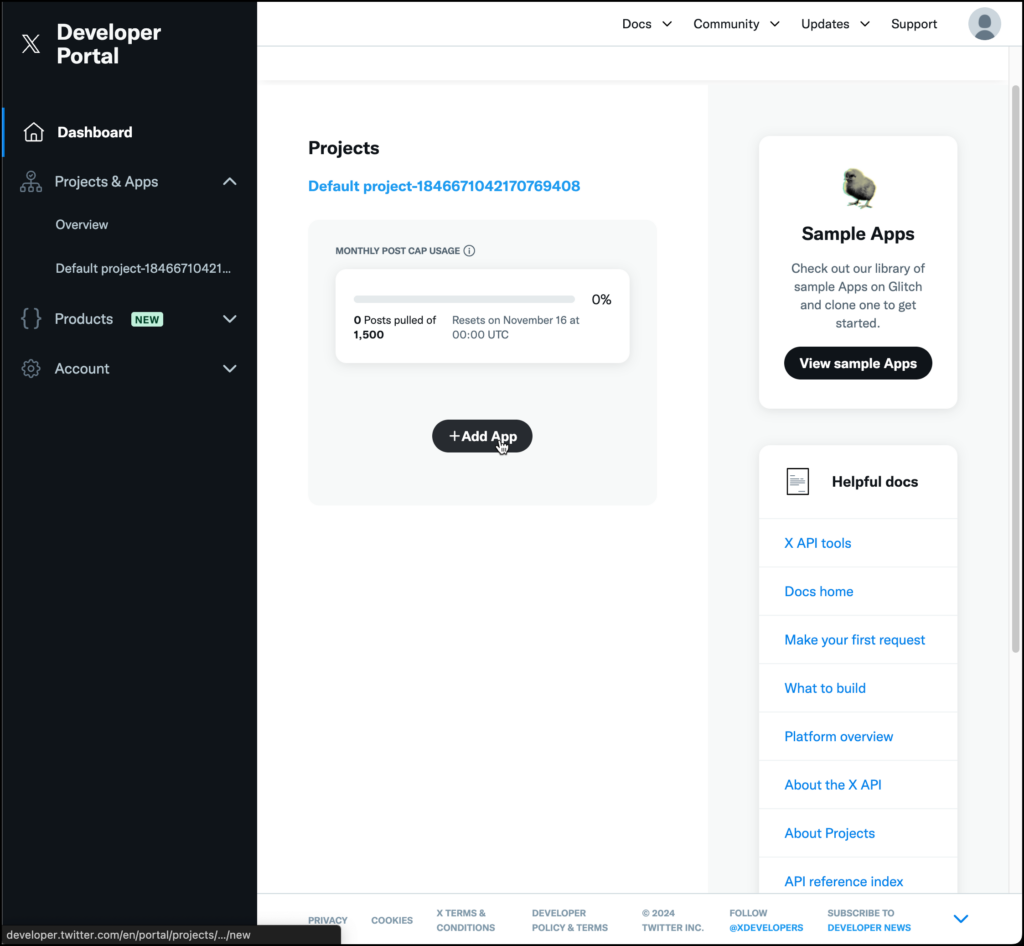
- Create the new App
- Click the “Add App” button.
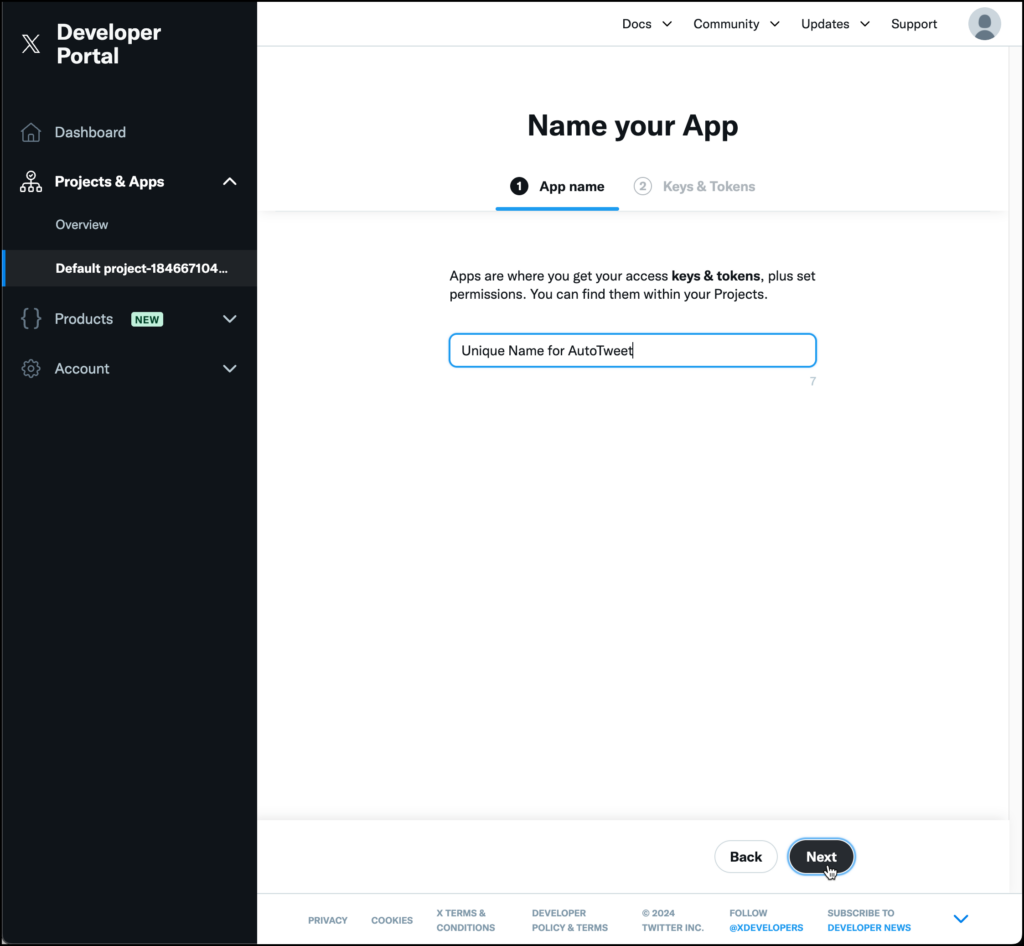
2. Enter App Details:
- You will be asked to provide basic information about your app:
- App Name: Choose a unique name that reflects the purpose of your app.
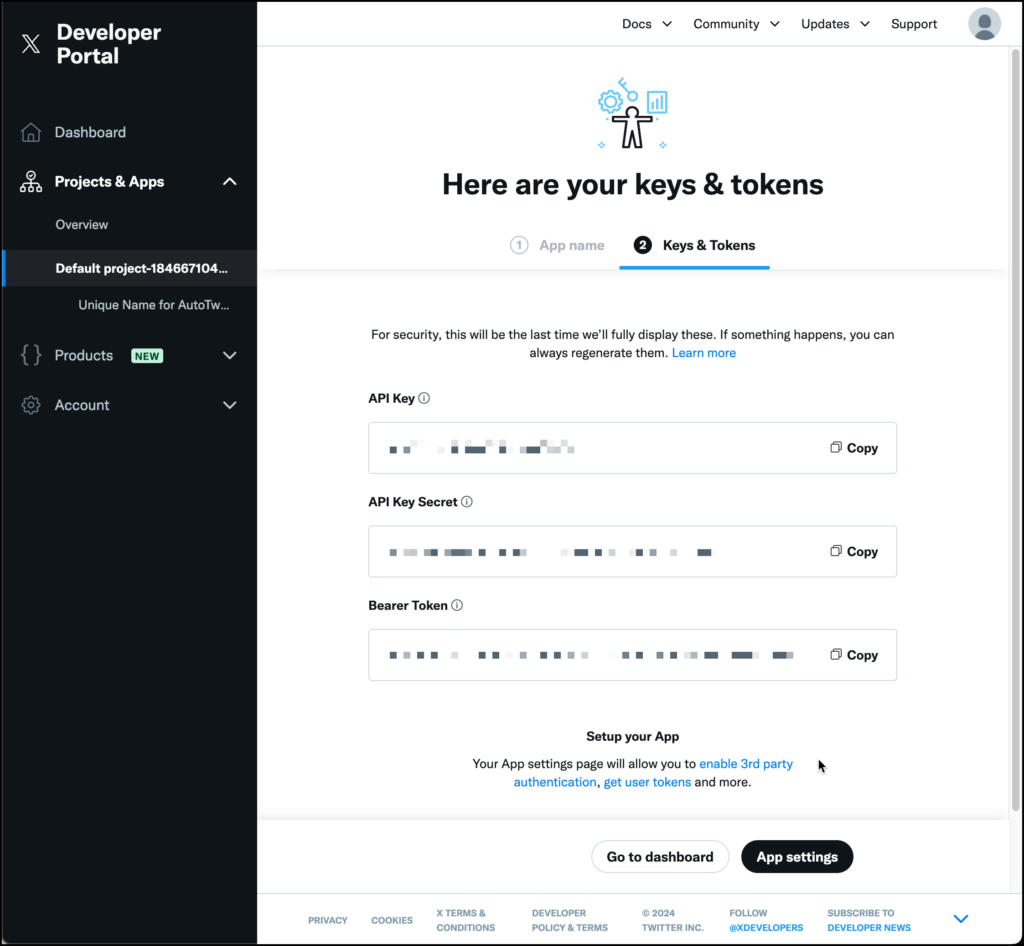
3. Save Your API Keys and Tokens:
• Once the keys and tokens are generated, make sure to copy them somewhere secure. You will need these to integrate the app with our platform.
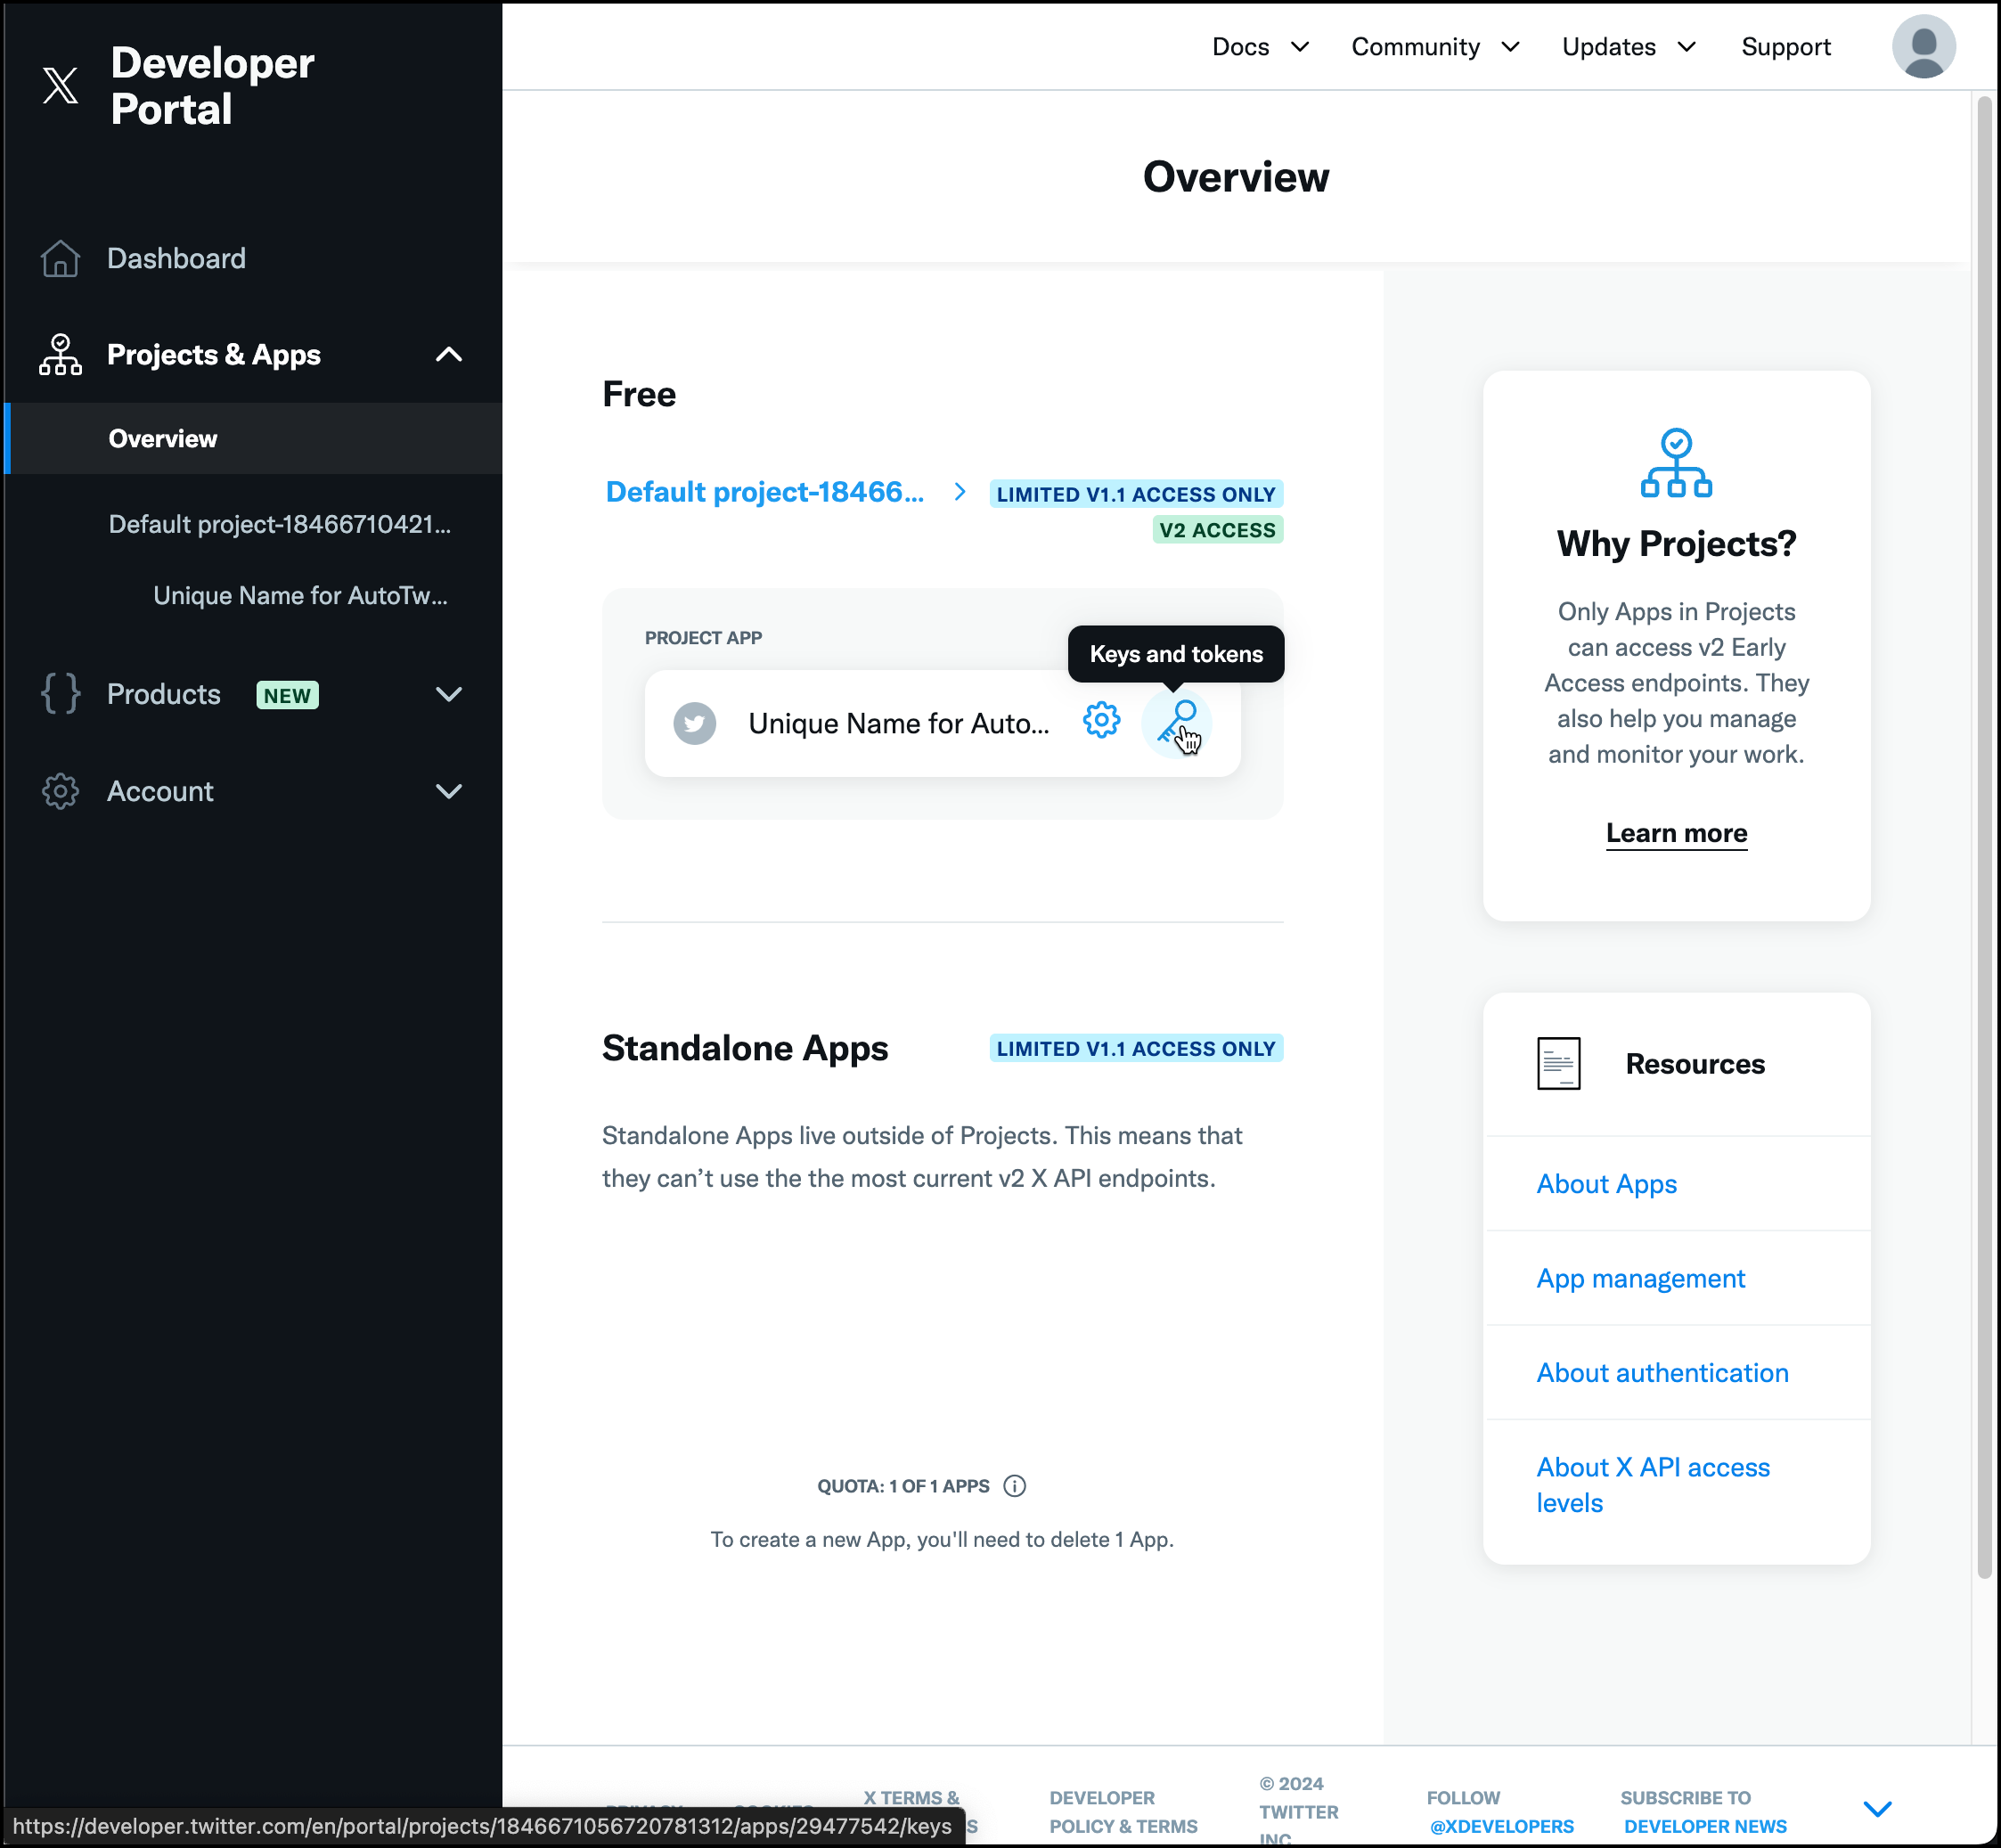
- Click on Overview in the left navigation.
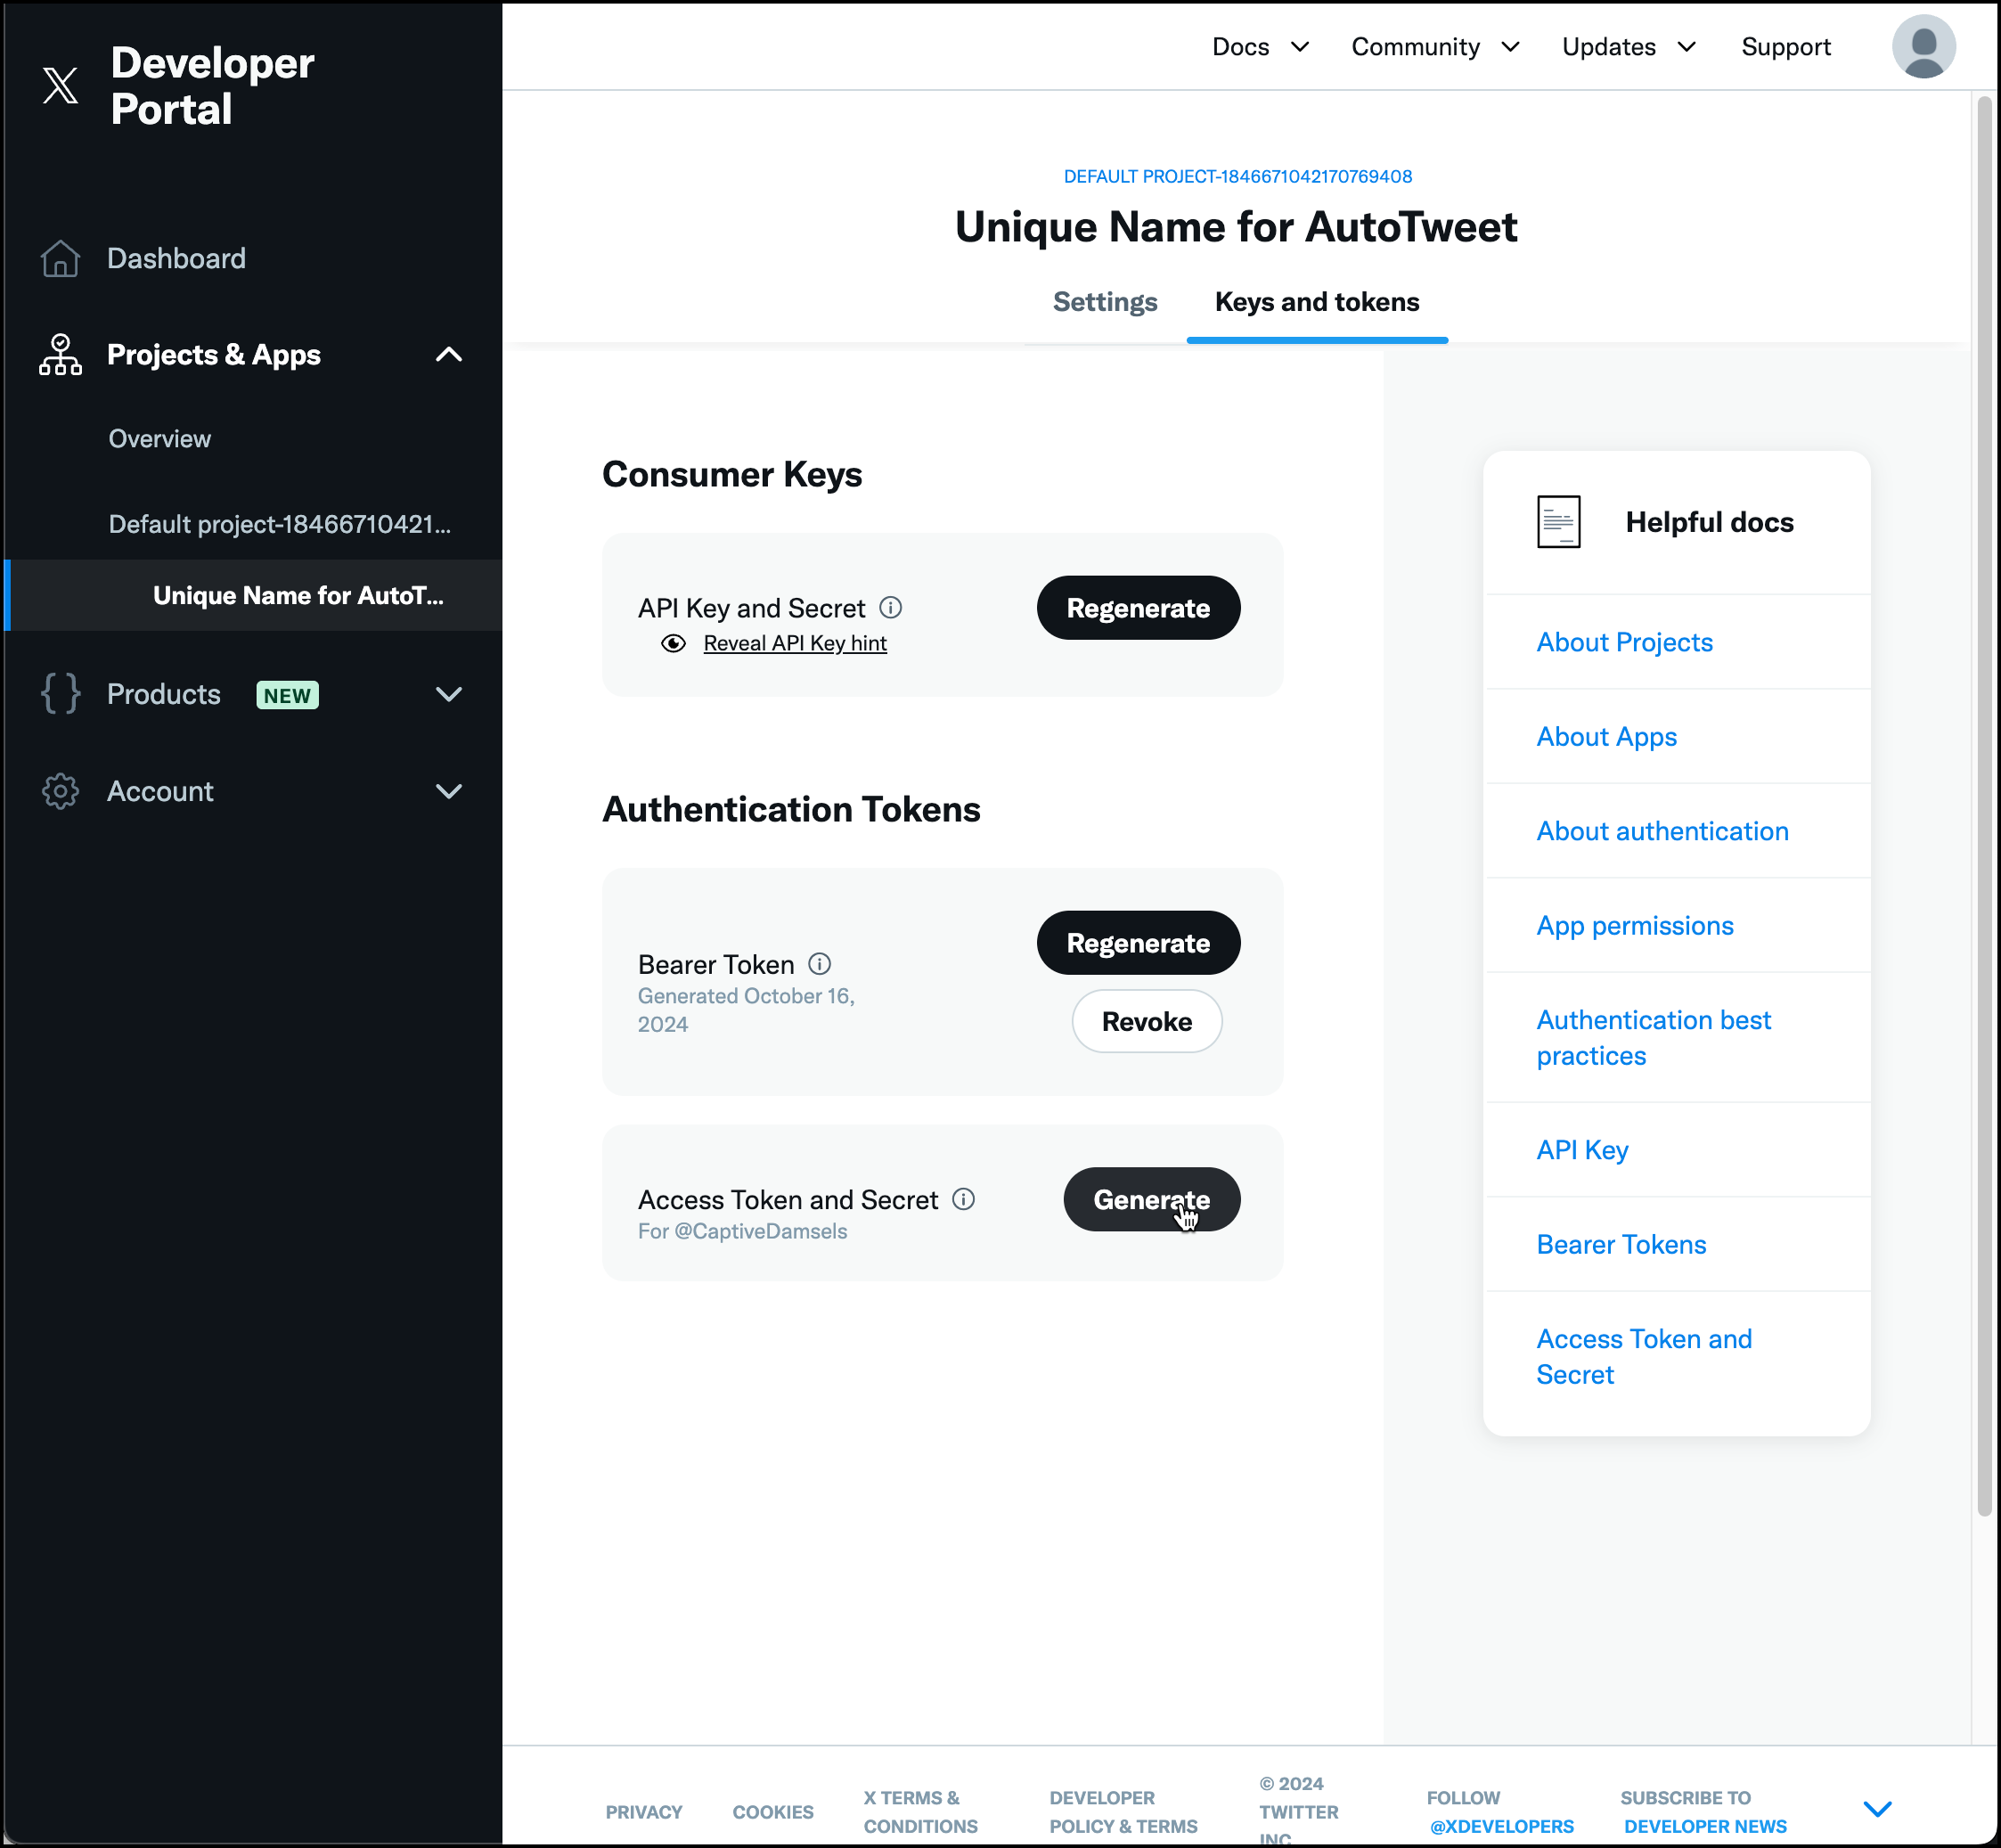
4. Generate Access Token and Secret
- Click on the Generate button
5. Save Your Access Token and Secret:
• Once the Access Token and Access Token Secret are generated, make sure to copy them somewhere secure. You will need these to integrate the app with our platform. Once you have saved them, click on the button to continue.
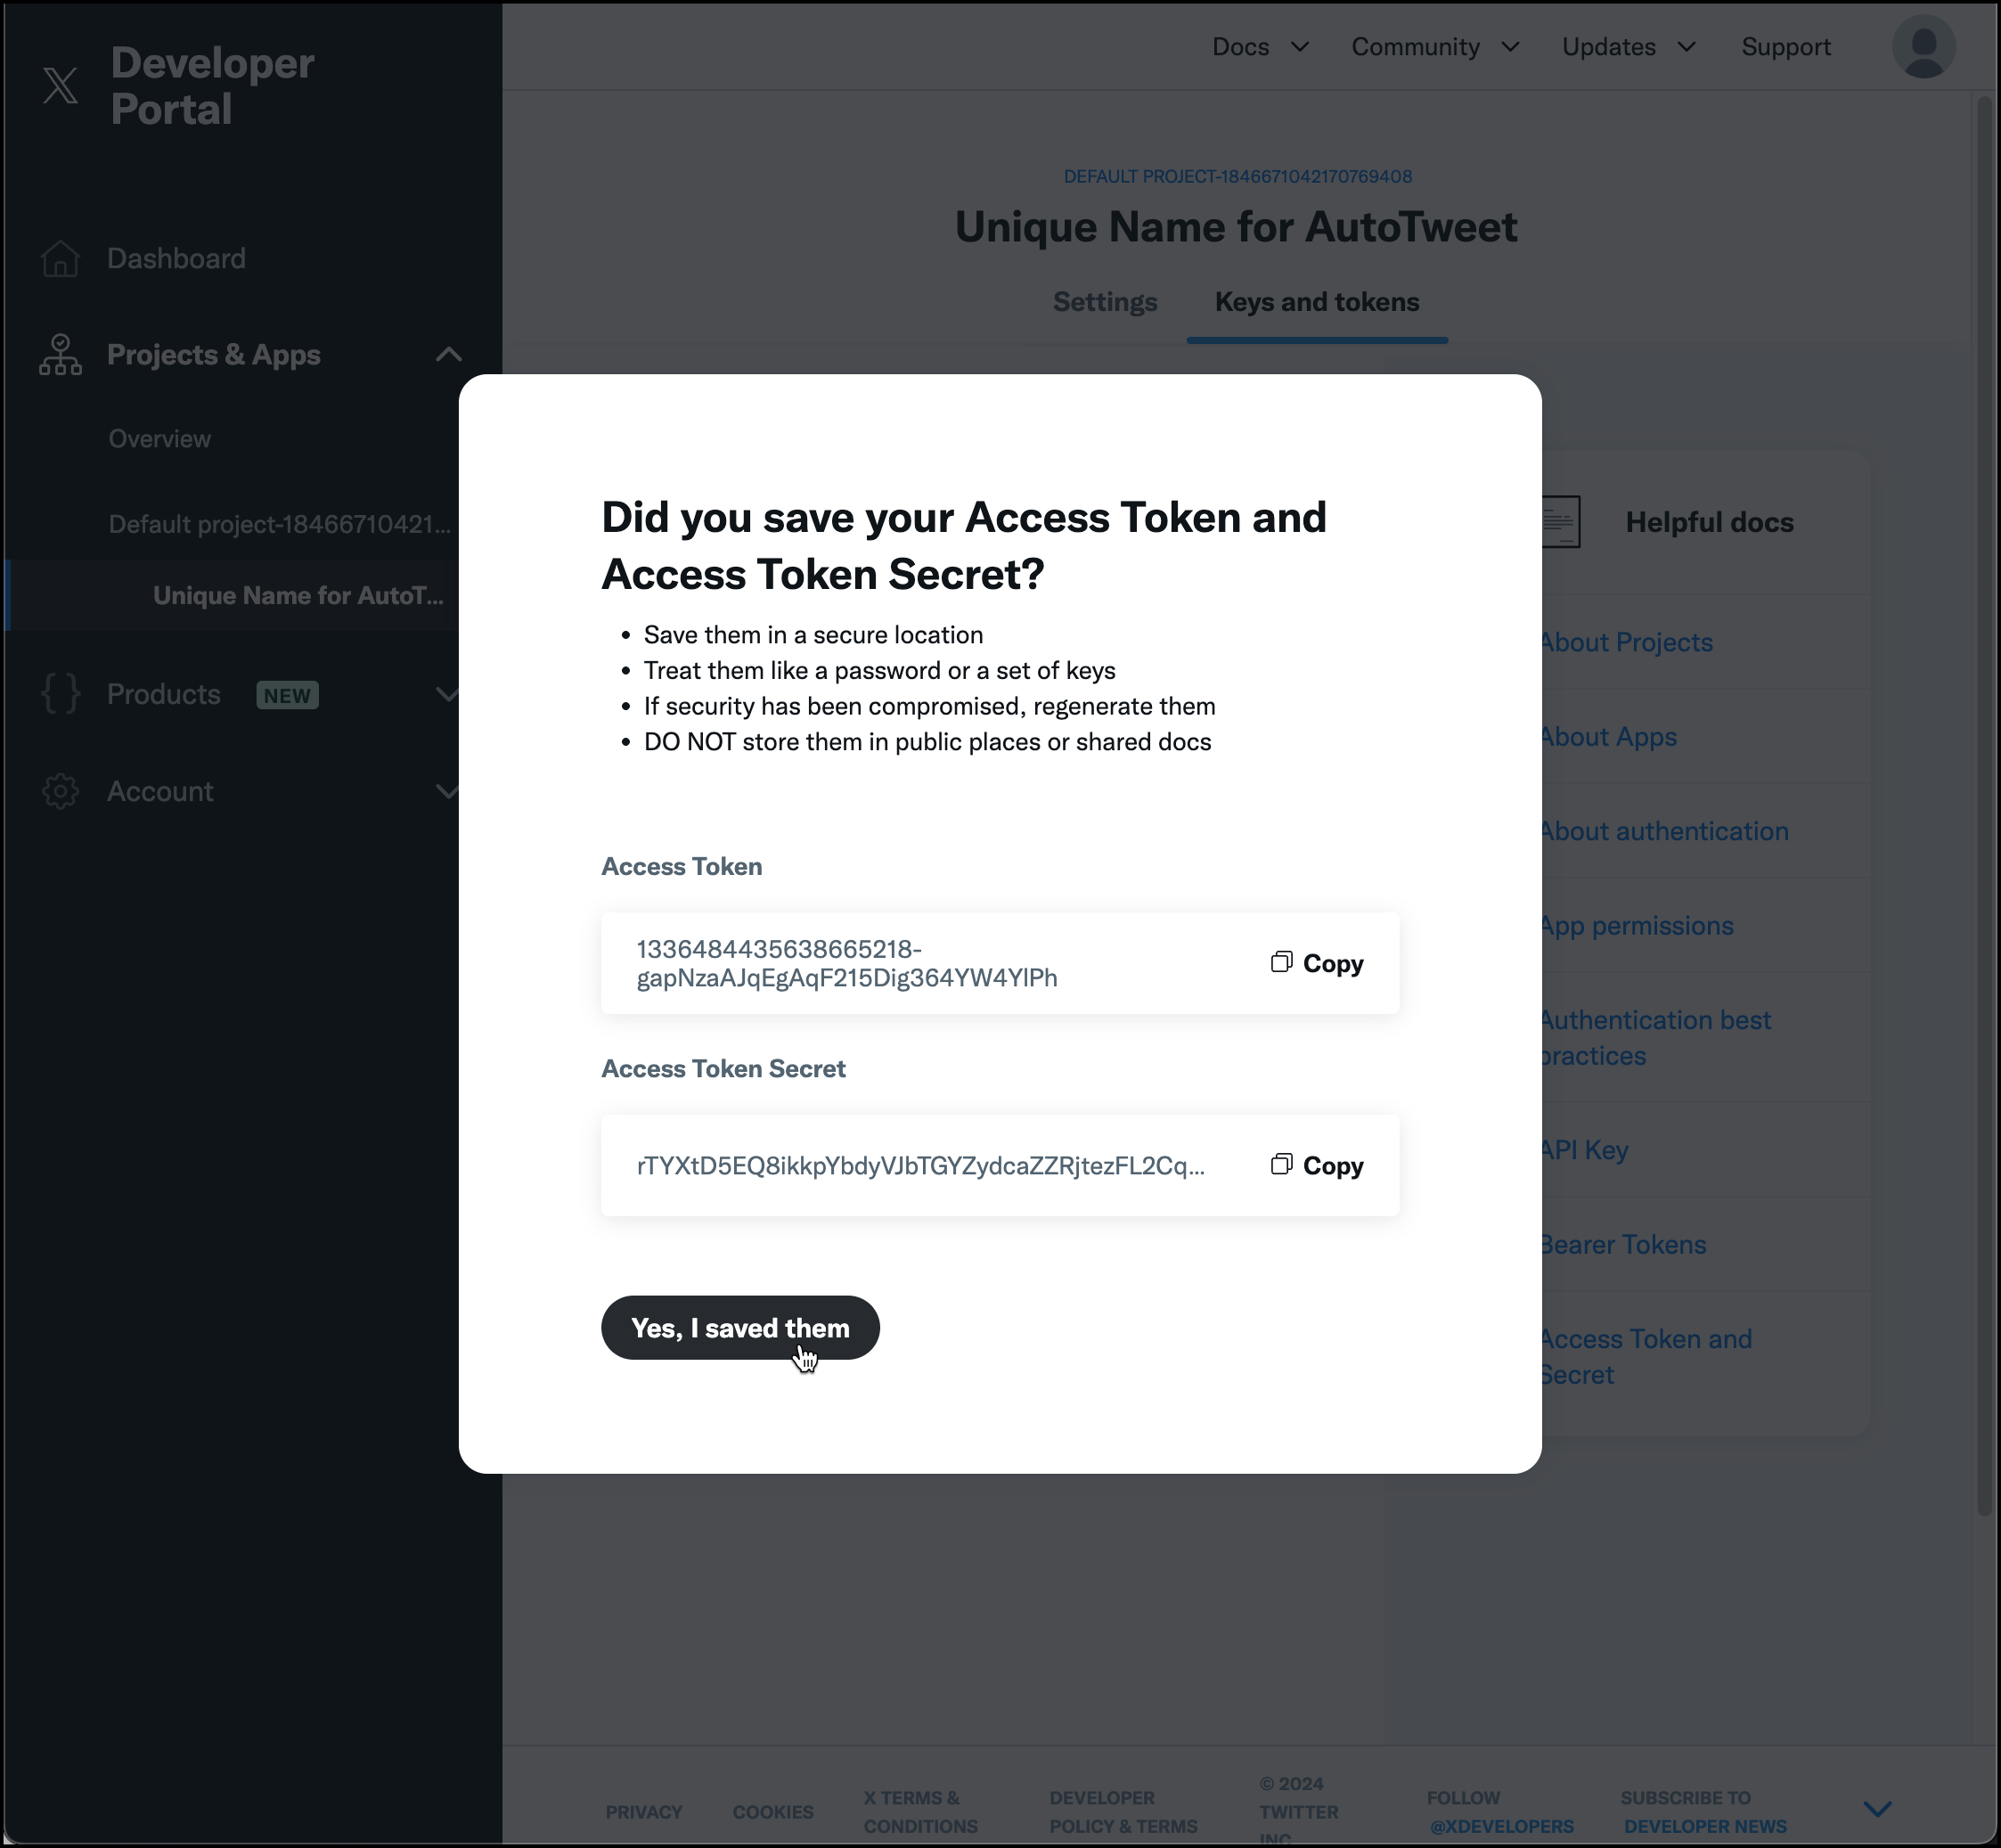
At this point, you have successfully created a new Twitter app, generated the necessary API key, API Key Secret, Access Token and Access Token Secret. The app is set to read only, so we need to update the user permissions.
Step 5: Set User Permissions
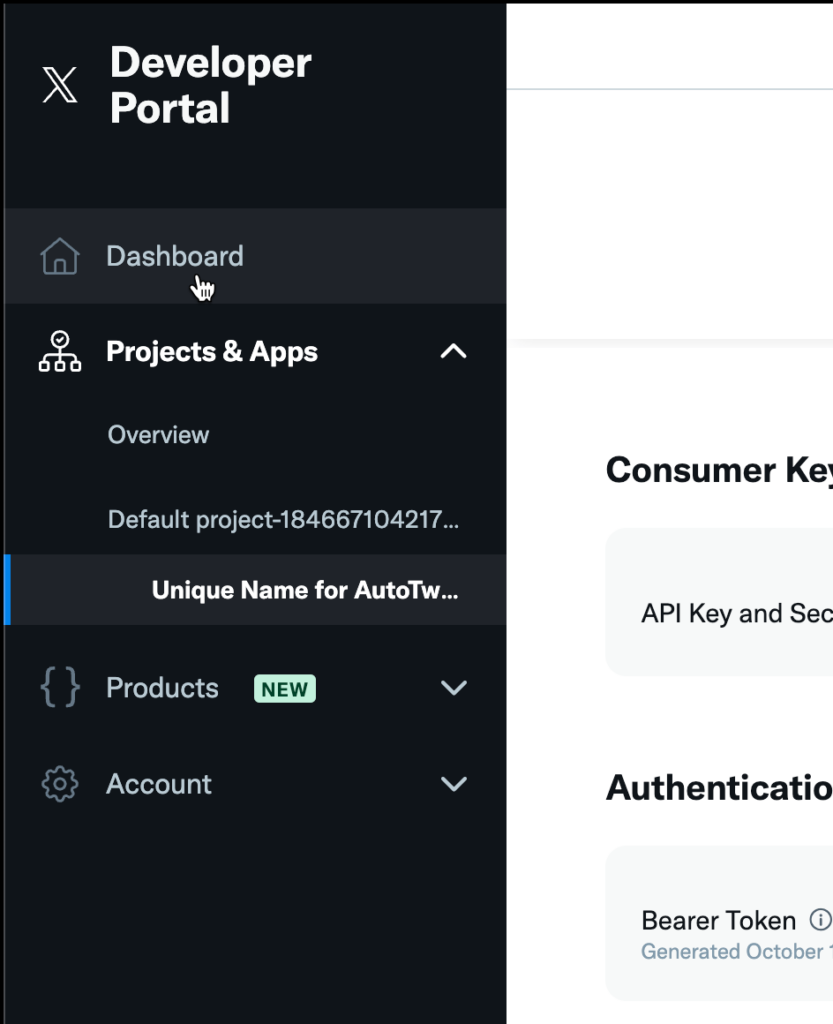
- Go back to the Twitter Developer Dashboard
– Click on Dashboard on the left
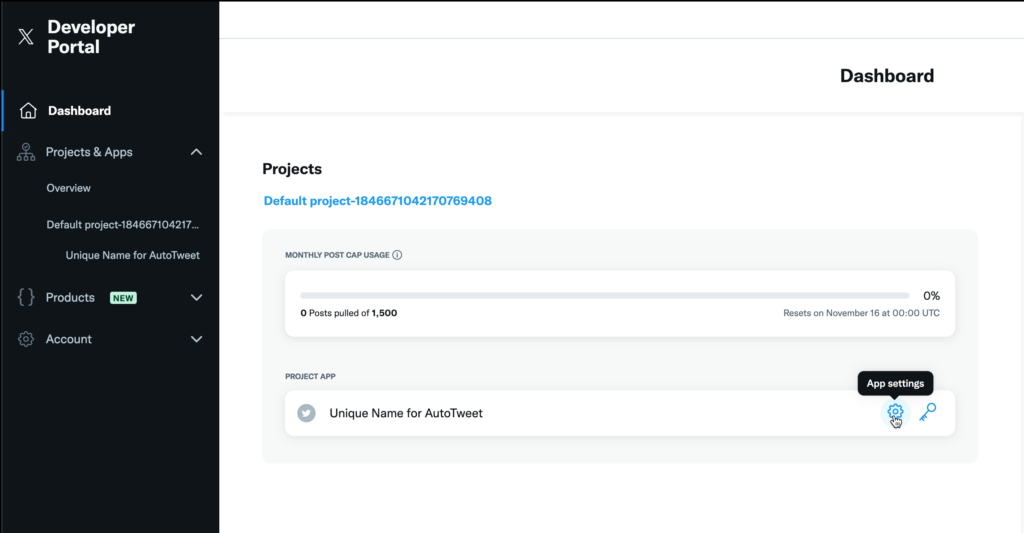
2.Click on App Settings icon
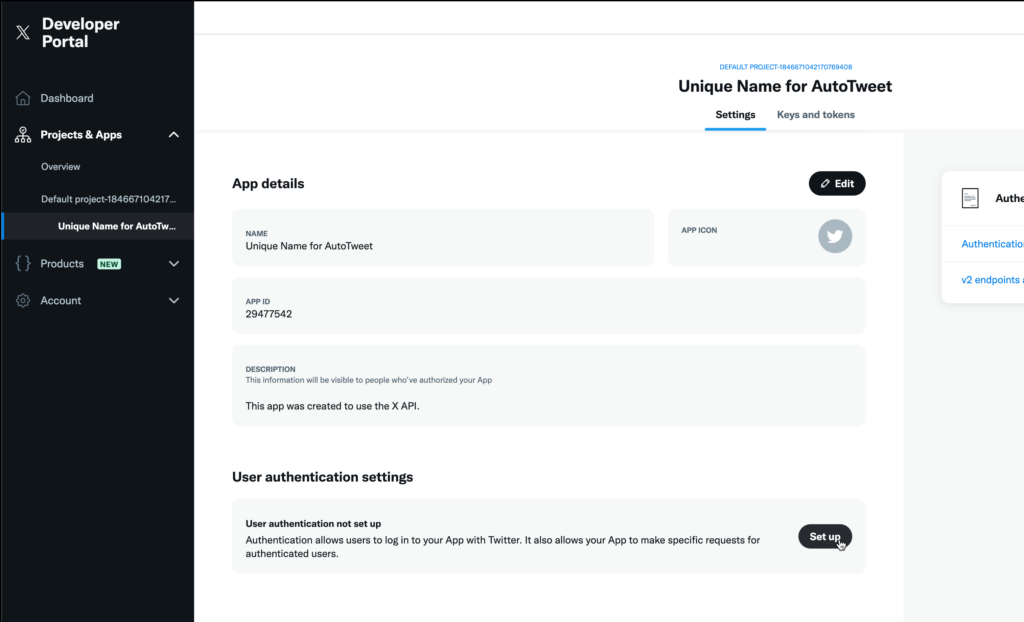
4. Set up User Authentication Settings
Click on Set up button
5. Set Permissions
- Set App permissions to Read and Write
- Set Type of App to Web App, Automated App or Bot
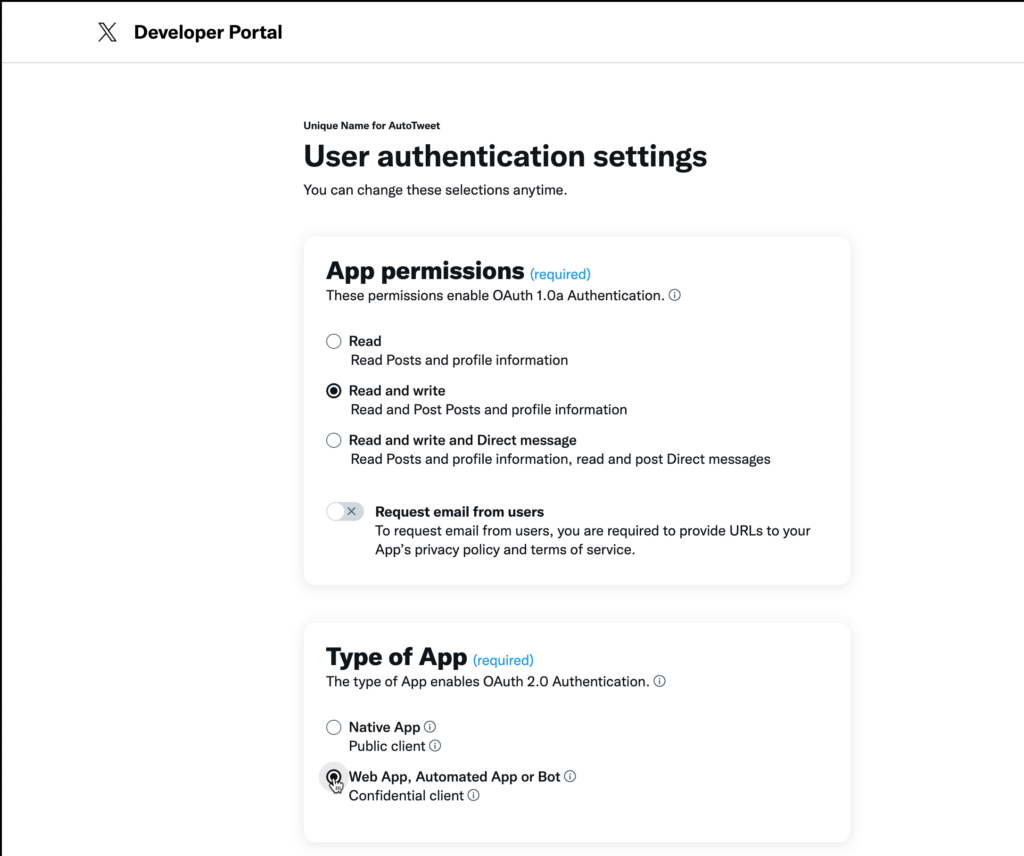
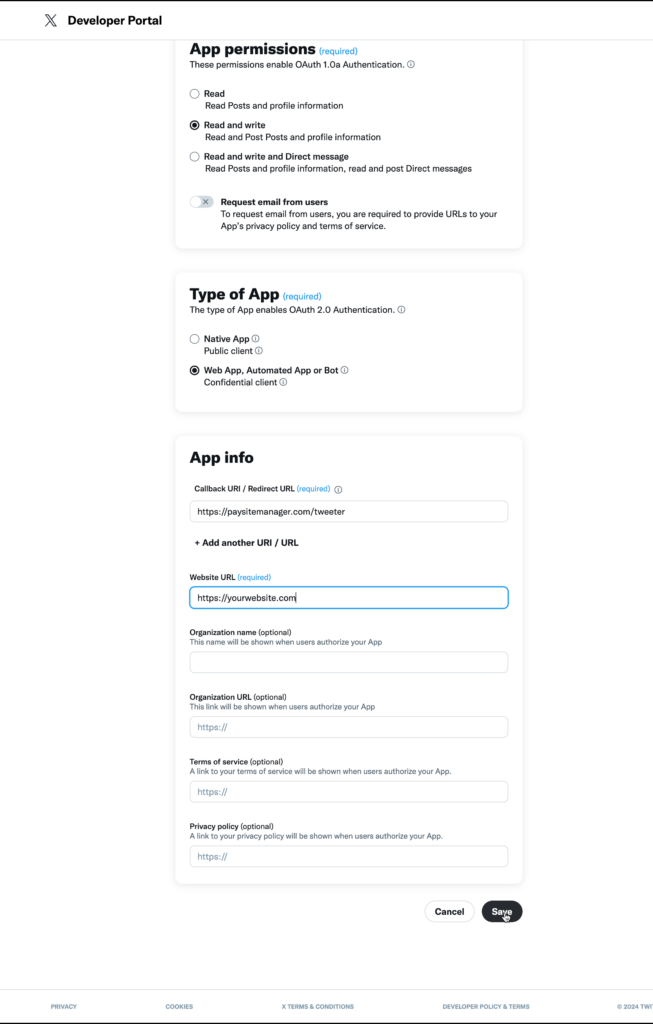
6. Update App Info with the following
- Callback URI: https://paysitemanager.com/tweeter
- Website URL: https://yourwebsite.com
- Click on the save button
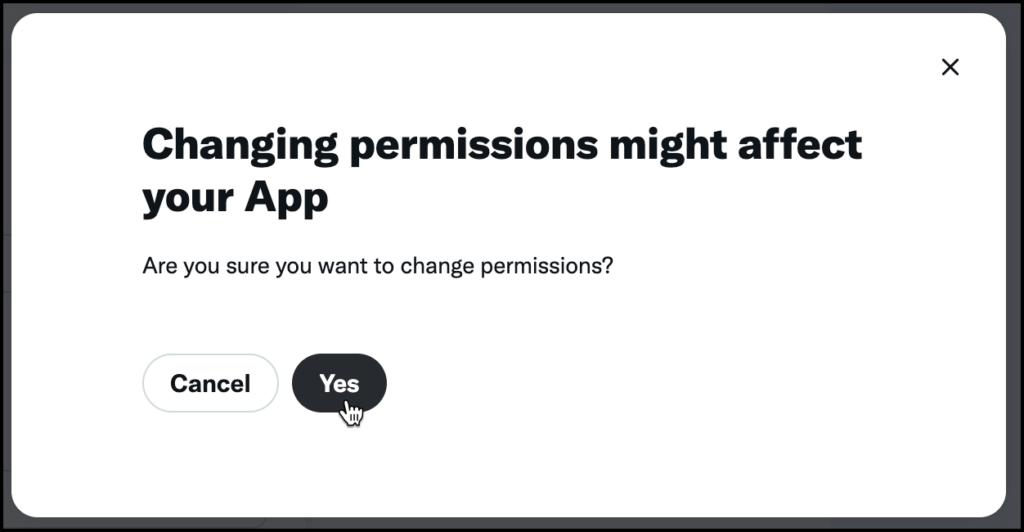
7. Change Permission Confirmation
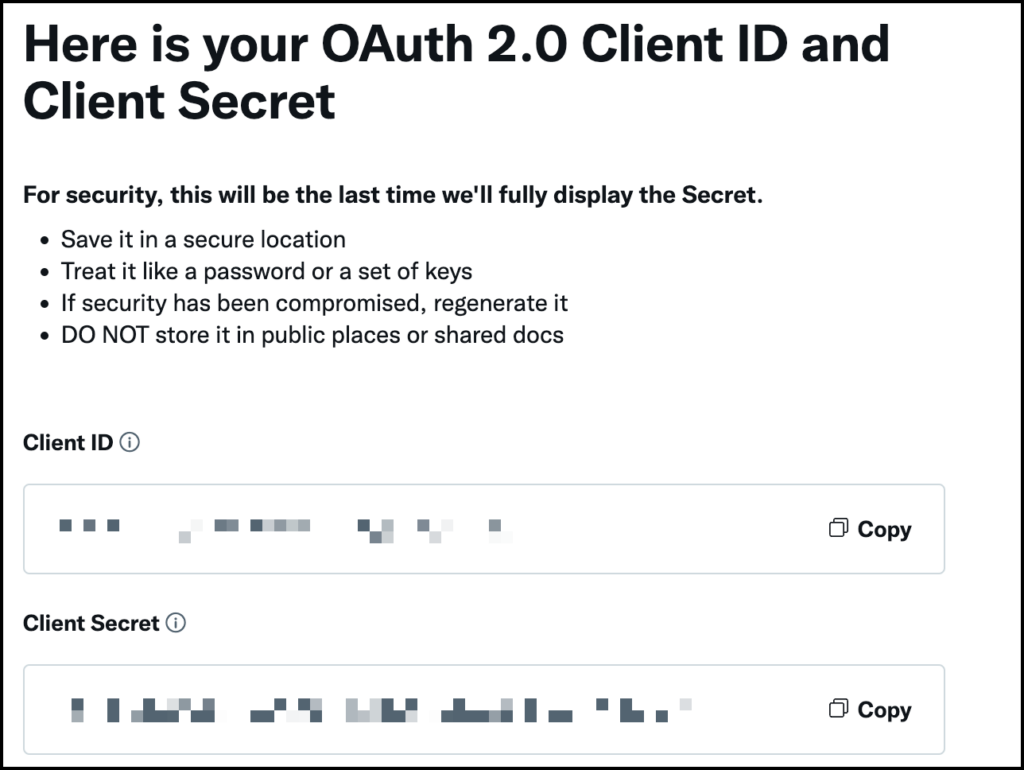
8. Save Client ID and Secret (not used in our system)
9. Reset Authentication Tokens
- Click on the Keys and Tokens tab

10. Regenerate Access Token and Secret
- the token and secret were created with Read Only permissions so we need to recreate them, click on Regenerate Button

11. Confirm Regenerate
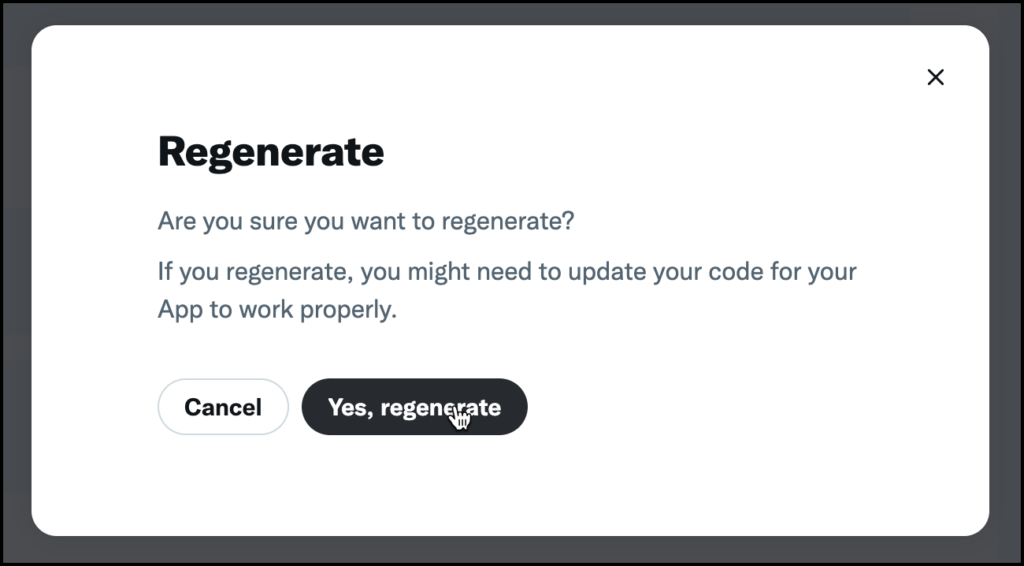
12. Save your Access Token and Secret (this replaces the ones that were created earlier)
Now go back to your PaysiteManager Dashboard and navigate to Twitter Settings in the left navigation under the Settings section.
Click on the Settings tab and enter the API key, API Key Secret, Access Token and Access Token Secret into the corresponding fields and press the ‘Save’ button at the bottom of the page.
You can now navigate to ‘Site Update Templates’ or ‘Content Sale Templates’ and enable Auto-Tweet for each one.
